Published May 2026. Last updated: July 2026
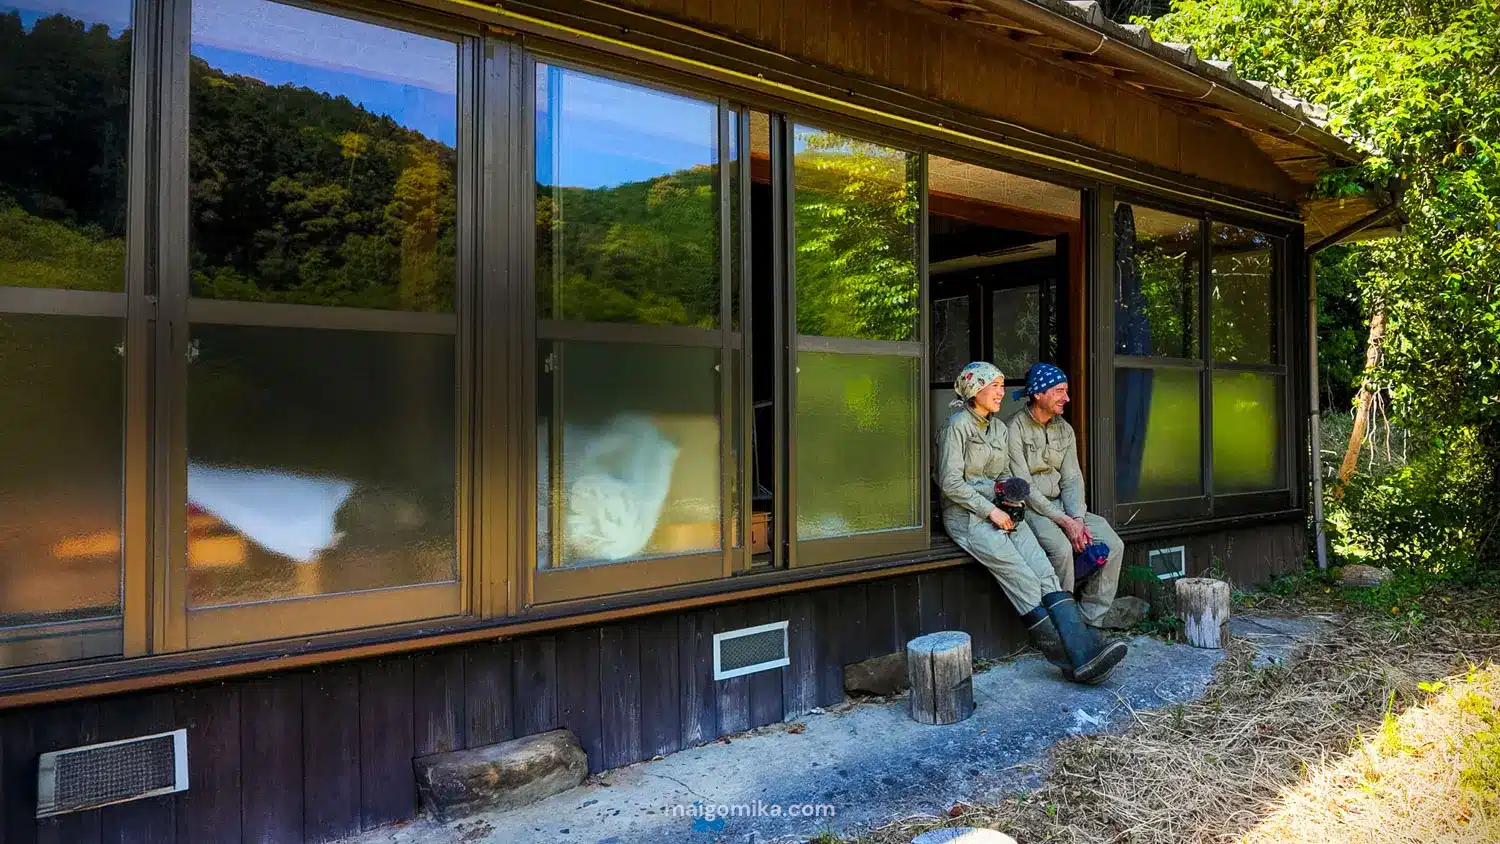
Today, we’re preparing to restore a house that turned out to be far older than we ever expected.
At first glance, our akiya (vacant house) didn’t appear to be particularly remarkable.
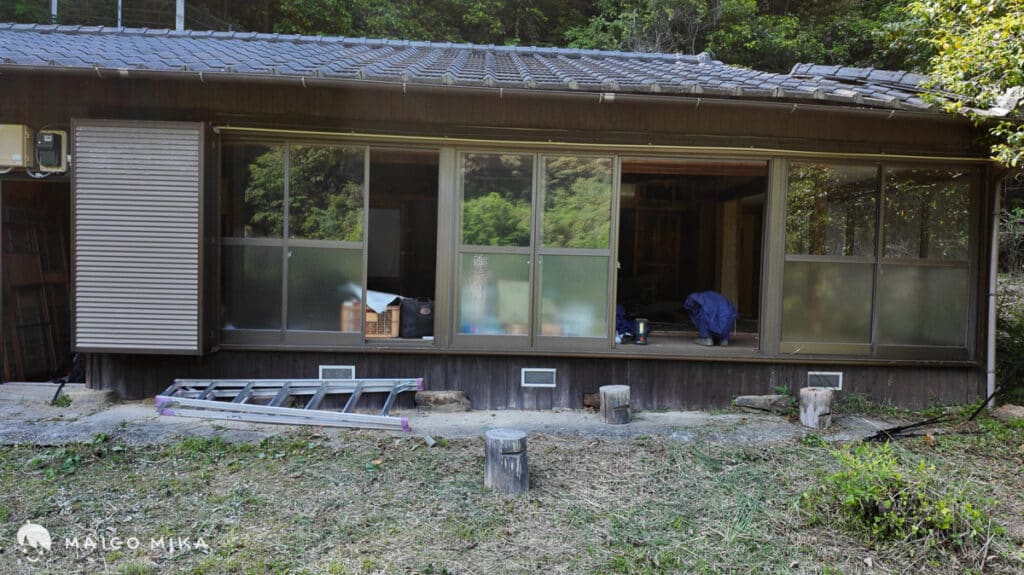
It had only been vacant for a few years, but signs of long-term neglect were already beginning to show. The road access was complicated, parts of the property were heavily overgrown, and it clearly needed a monumental amount of work.
But once we stepped inside, we began finding the historic details of a traditional house we had been looking for.
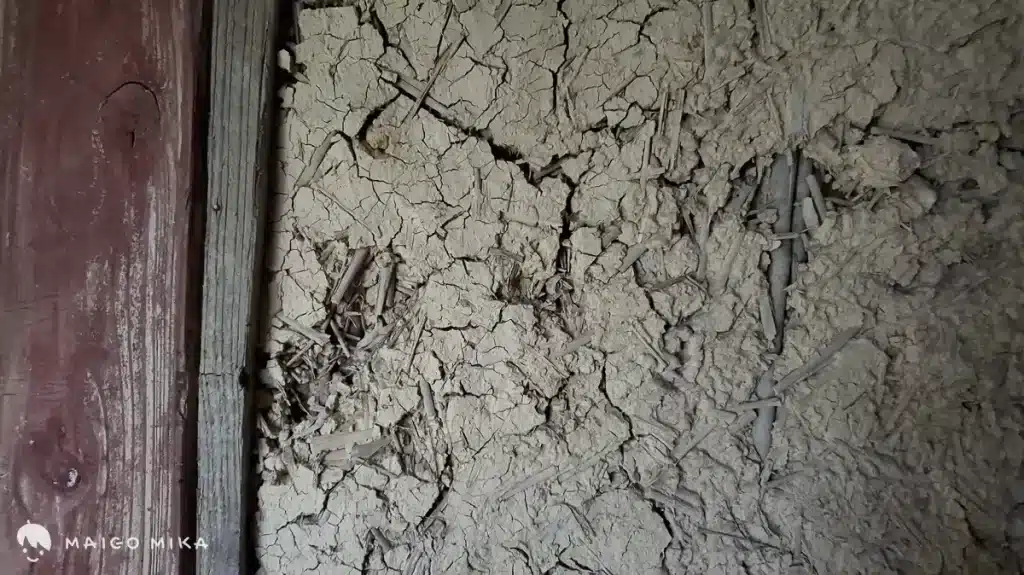
Dark, soot-stained beams, the kind that spent decades baking above an irori sunken hearth, peeked behind crumbling vinyl wall panels. We peeled back cheap siding to reveal the original earth-and-bamboo mud walls.
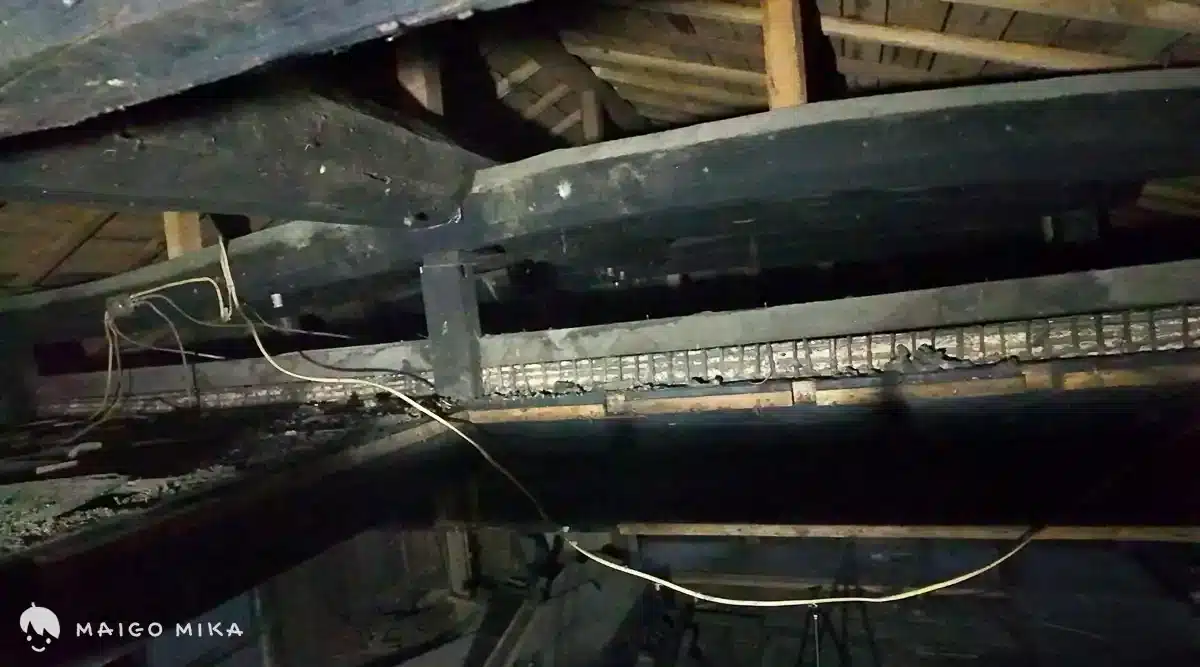
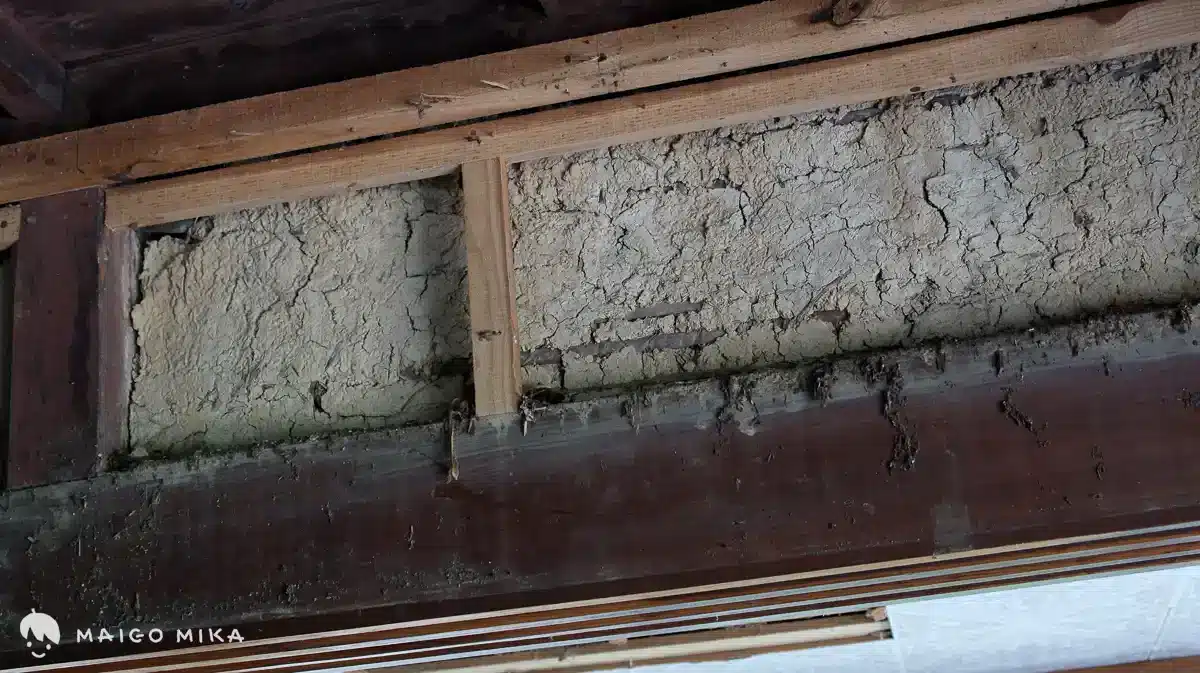
Everywhere we looked, there were hints that this house was far older than it first appeared, its historic character slowly buried by decades of quick-fix renovations.
It was the surrounding property that won us over. There was a bamboo-lined forest path nearby, a small stone bridge crossing a creek, and an old workshop that Jesse immediately imagined using for future projects.
We were hooked.
We knew we wanted a structural fixer-upper. Just as importantly, we needed something small and affordable enough that we could purchase it outright and renovate over time. Over the years, we’ve repaired our current rental house—replacing structural beams, restoring shoji doors, removing false ceilings, and adding insulation.
But this kominka folk house is on a completely different scale. It will take more time, more money, and undoubtedly more patience than anything we’ve tackled before.
This page is the permanent home for our renovation roadmap, project milestones, and actual costs. 🔖Bookmark this page and check back regularly as the project evolves.
Project Snapshot
- House Age: ~150 years old (Edo/Meiji era transition)
- House Size: 246 m2
- Property Size (mix of forest & hybrid land: 2,840 m2
- Purchase Price: ¥400,000
- Estimated Completion: 2–3 years
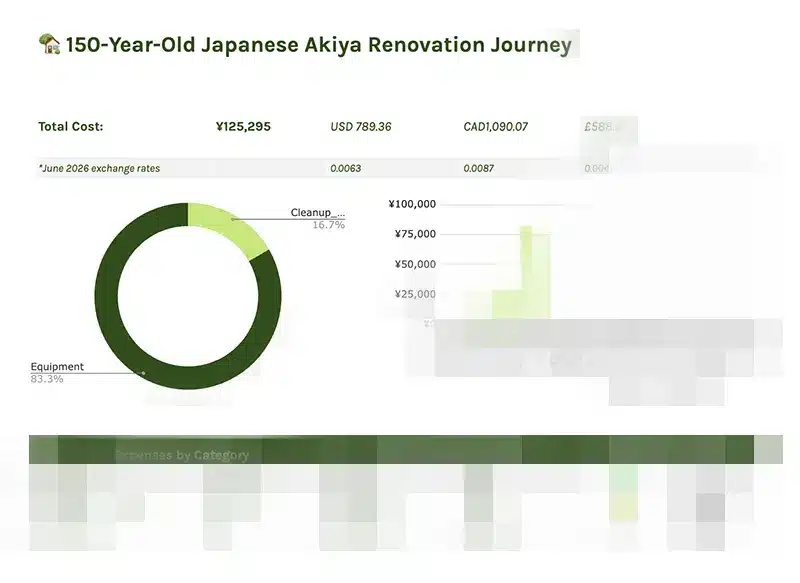
- Budget Spent to Date: ¥125,295
📋 Current Phase: Phase 3 (Road Access & Retaining Wall Engineering)
What We Bought
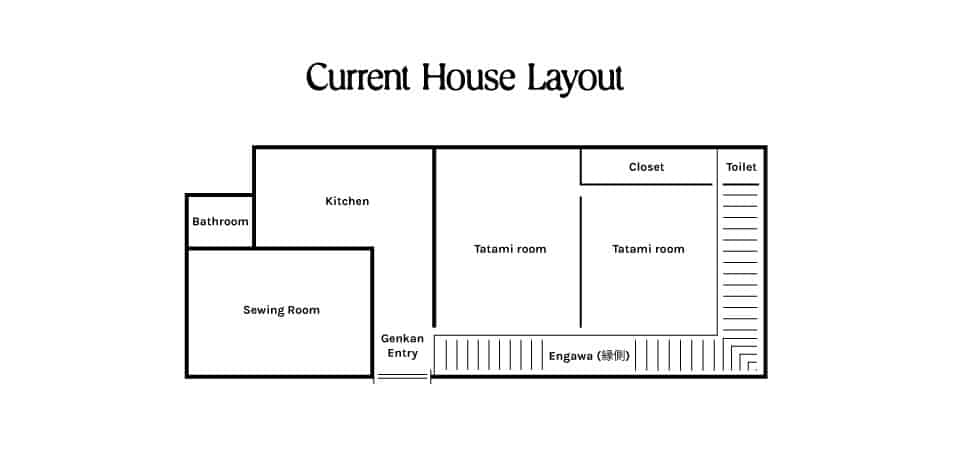
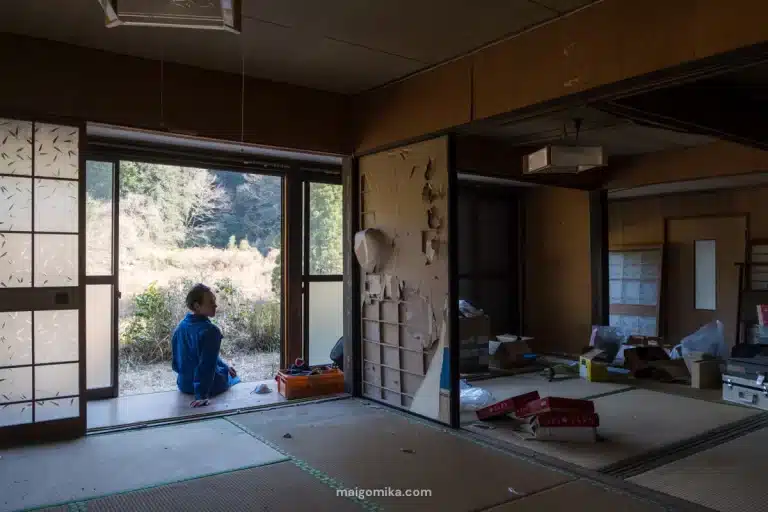
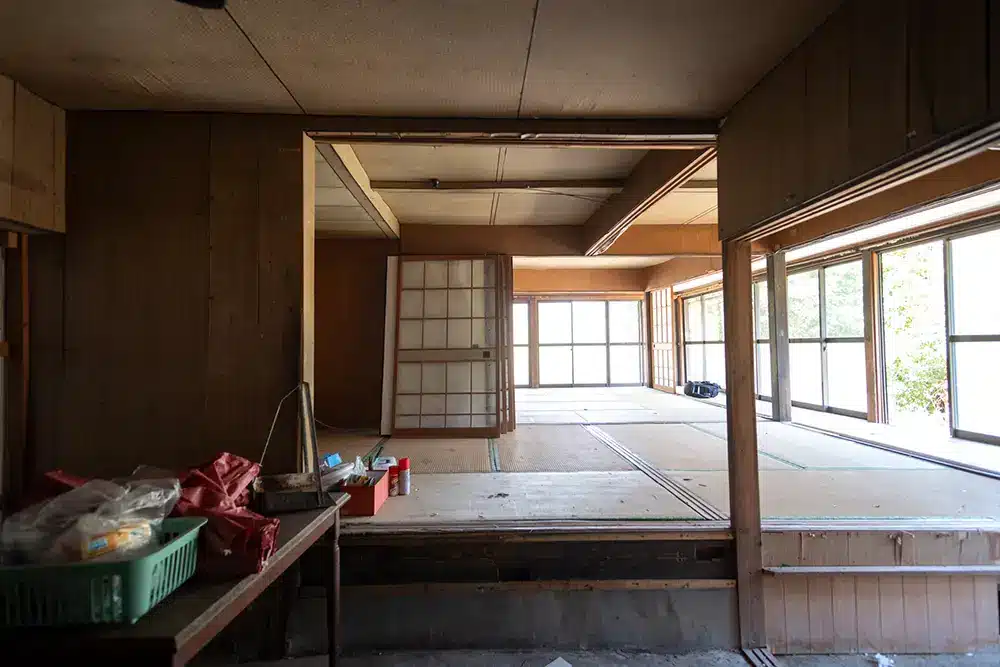
At around 246㎡, the house has a simple rectangular layout with traditional tatami rooms, a small kitchen, bathroom, a newer sewing room addition, and some storage spaces. It had only been abandoned for about three years, but it still contained the previous owner’s furniture, tools, and decades’ worth of belongings, all of which would need to be cleared before any renovation work could begin.
Structurally, it was a mix of good news and bad. The flooring had been replaced relatively recently and was in surprisingly good condition, but the roof was nearing the end of its life and will eventually need to be replaced.
Over the years, a number of alterations had also changed the original house. The most significant was the addition of a sewing room at the front, where one of the original structural beams had been cut to create a wider opening.
Decades of piecemeal renovations had also obscured much of the house’s original character beneath vinyl wall panels and false ceilings. Once we began peeling those layers away, we discovered the features that convinced us the house was worth saving: massive soot-blackened beams, traditional mud walls, and glimpses of the folk house it had once been.
The house also came with around 2,800㎡ of surrounding land, plus approximately 2,100㎡ of agricultural fields that we lease and are responsible for maintaining.
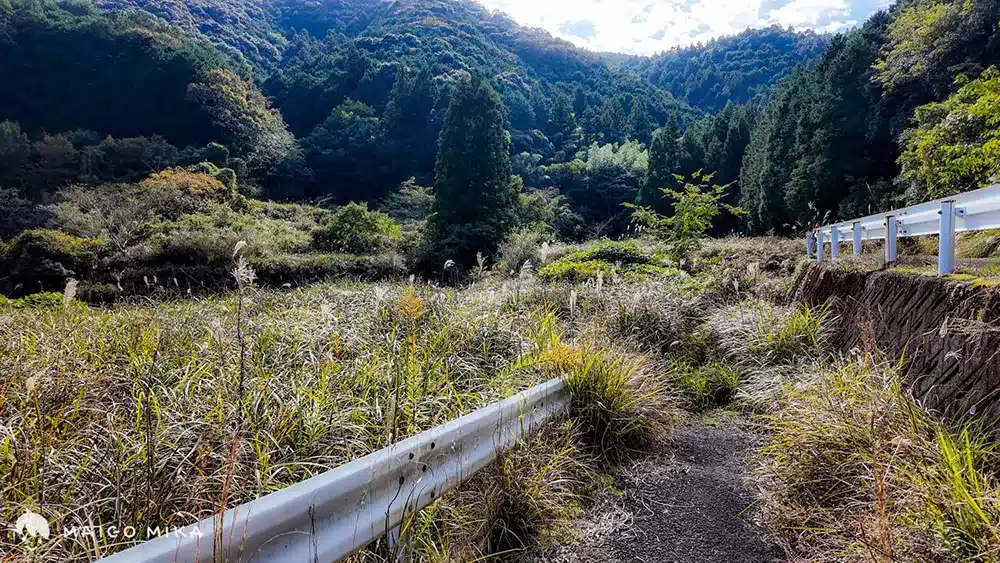
By the time we first arrived, much of the property had disappeared beneath years of overgrown grass, bamboo, vines, and young trees, making reclaiming the land almost as big a project as restoring the house itself.
📖 Read the story here: We Bought an Akiya in Japan. The Real Process (And Why It Took a Year)
Our Vision for the House
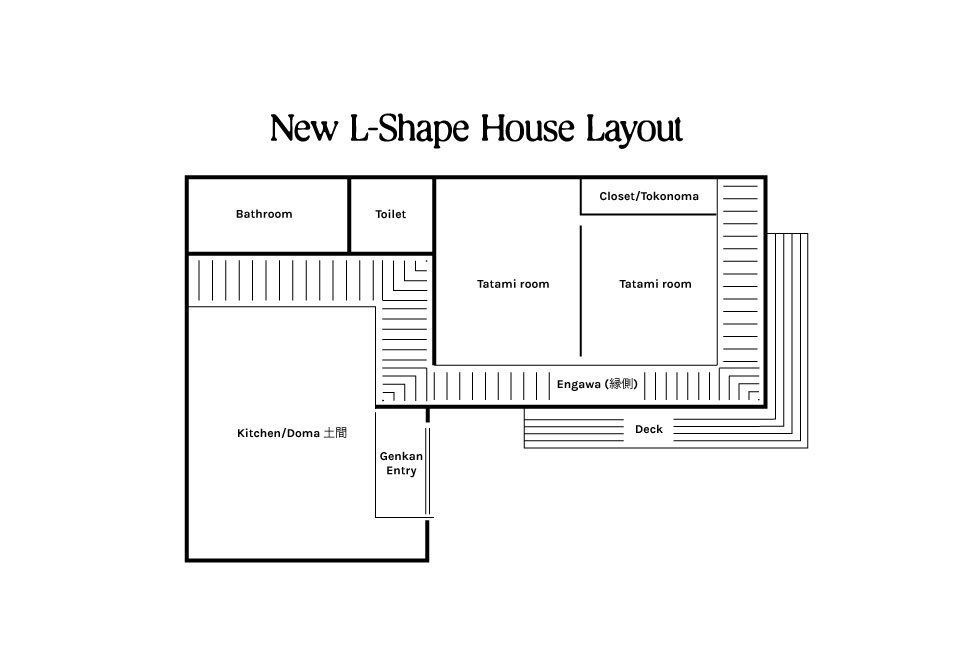
Our goal is to preserve as much of its traditional character as possible while making it comfortable enough to live in year-round.
Subject to engineering advice and local approvals, these are some of the changes we’d love to make:
- Create an L-shaped extension that blends with the original house
- Relocate the kitchen to the former sewing room
- Consolidate the bathroom and plumbing into one area
- Raise the old kitchen floor so it sits level with the tatami rooms
- Reintroduce a traditional doma entrance
- Improve insulation throughout the house
- Rebuild and expand the engawa
- Restore the surrounding land and develop the gardens and farmland
Our Project Status & Roadmap
What began as a simple property viewing in November 2024 turned into a year-long marathon of paperwork, cleanup, planning, and preparation. Here is exactly where the project stands today:
| Phase | Status | Estimated Timeline |
|---|---|---|
| Phase 1: House Cleanup | ✅ 100% Complete | 2.5 months |
| Phase 2: Demolition | 🟡 5% In Progress | 5 months |
| Phase 3: Road Access and Retainer Wall Engineering | 🟡 5% In Progress | 4 months |
| Phase 4: Design, Engineering & Permits | ⚪ 0% Not Started | 12 months |
| Phase 5: Roof & Weatherproofing | ⚪ 0% Not Started | 5 months |
| Phase 6: Structural Renovation | ⚪ 0% Not Started | 1.5-2 years |
| Phase 7: Interior Finishes | ⚪ 0% Not Started | 8 months |
| Phase 8: Land Clearing | 🟡 10% In Progress | 3 years |
We know old houses love to throw curveballs, so this order will change. But here is our step-by-step game plan:
✅ Phase 1: House & Property Cleanup
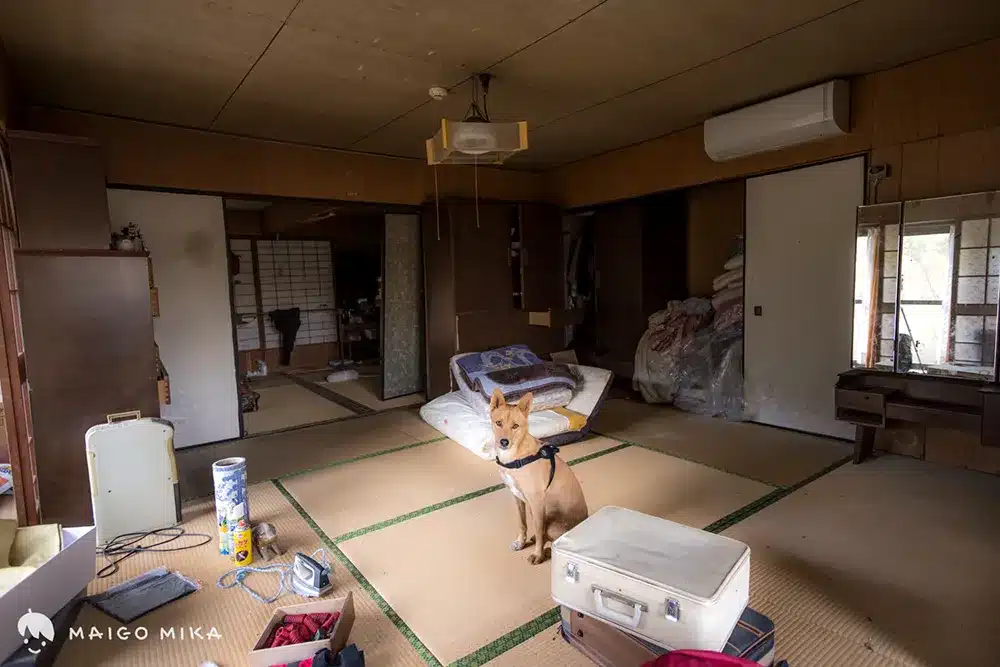
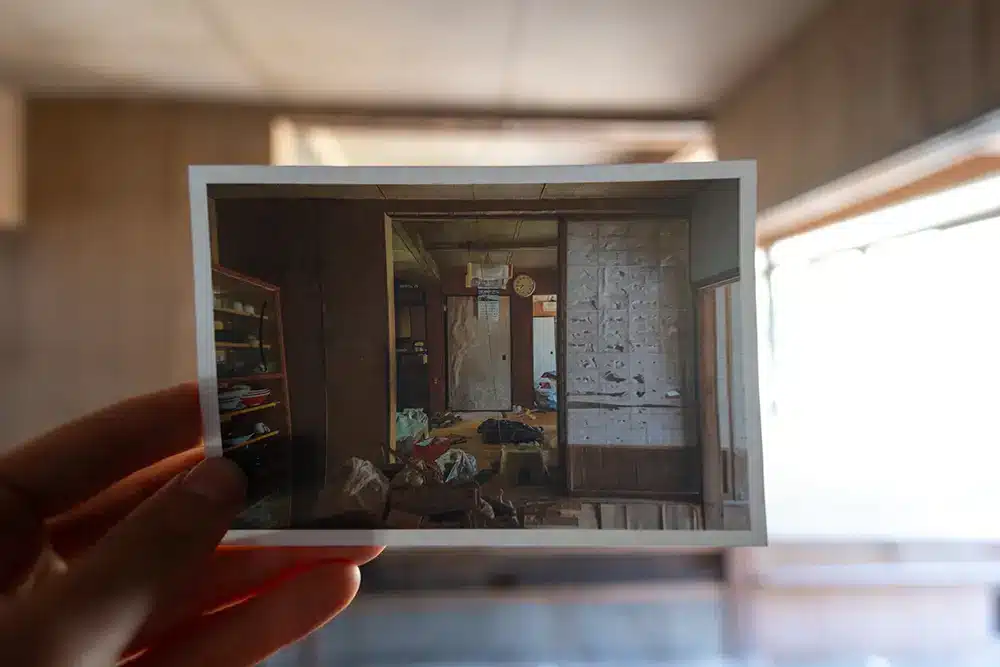
As soon as we took ownership of our 150-year-old house, we faced our very first task: cleaning up and disposing of garbage.
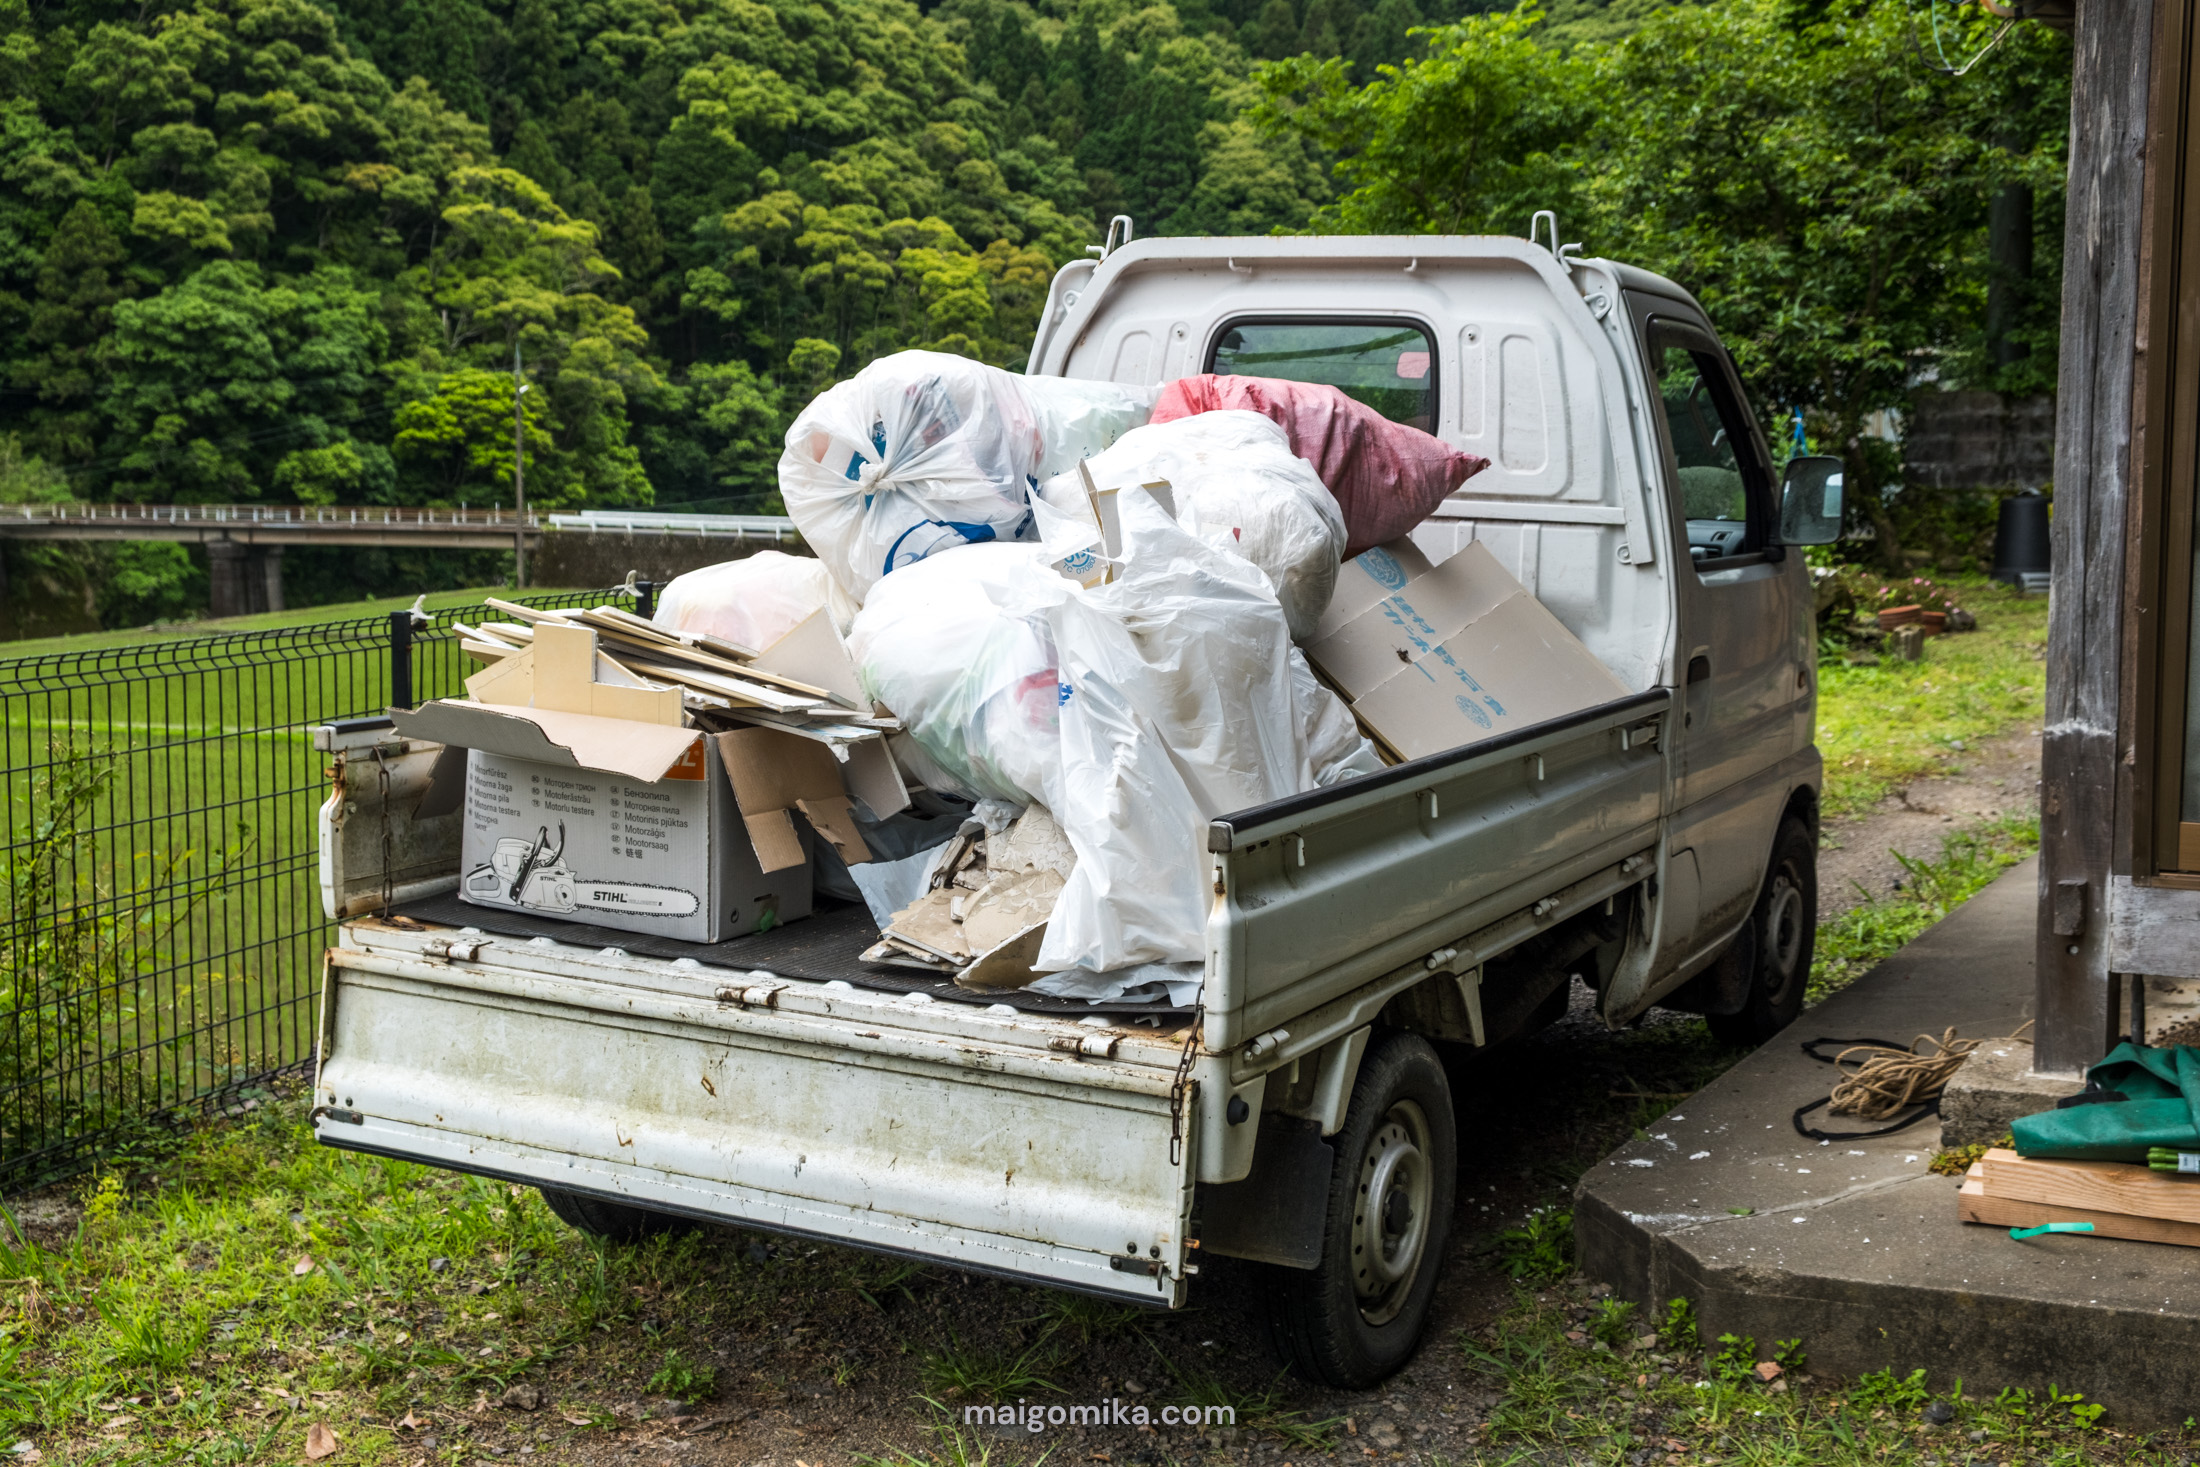
The house still contained decades’ worth of belongings, furniture, tools, and household items accumulated by previous generations. Before any renovation work could begin, we needed to sort, organize, remove, and dispose of everything while navigating the Japanese disposal system.
In total, it took nearly three months to clear the house, with countless trips to the local waste facility along the way.
What I Learned About Cleaning
As we cleared out the house, I learned a few things along the way. One is that most household waste in Japan is incinerated rather than sent to landfill, and many incineration plants generate electricity from the heat they produce.
You also can’t simply throw away large appliances like refrigerators, washing machines, TVs, and air conditioners in Japan. They must be recycled through a special nationwide system and require separate recycling fees.
Even if you own a house in Japan, some municipal waste facilities may require proof that you’re a local resident before allowing you to use their disposal services.
And finally, construction waste, such as drywall, metal, and concrete, is often treated differently from normal household waste, and disposing of it can cost nearly as much as buying new building materials.
📖 Read my full guide to garbage disposal when renovating an akiya house in Japan.
🟡 Phase 2: Demolition
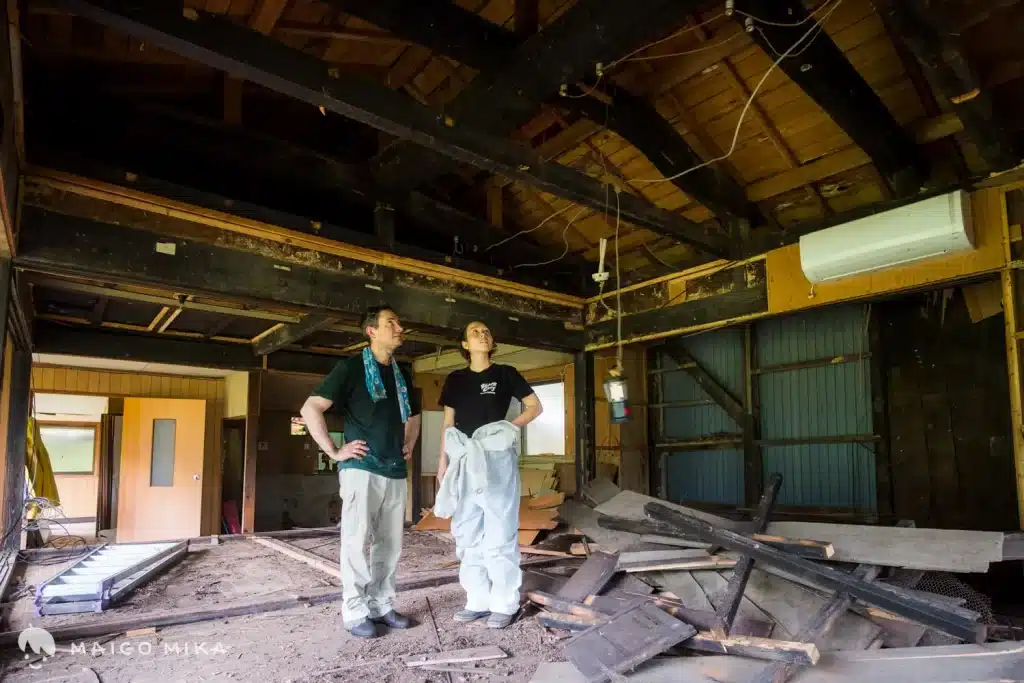
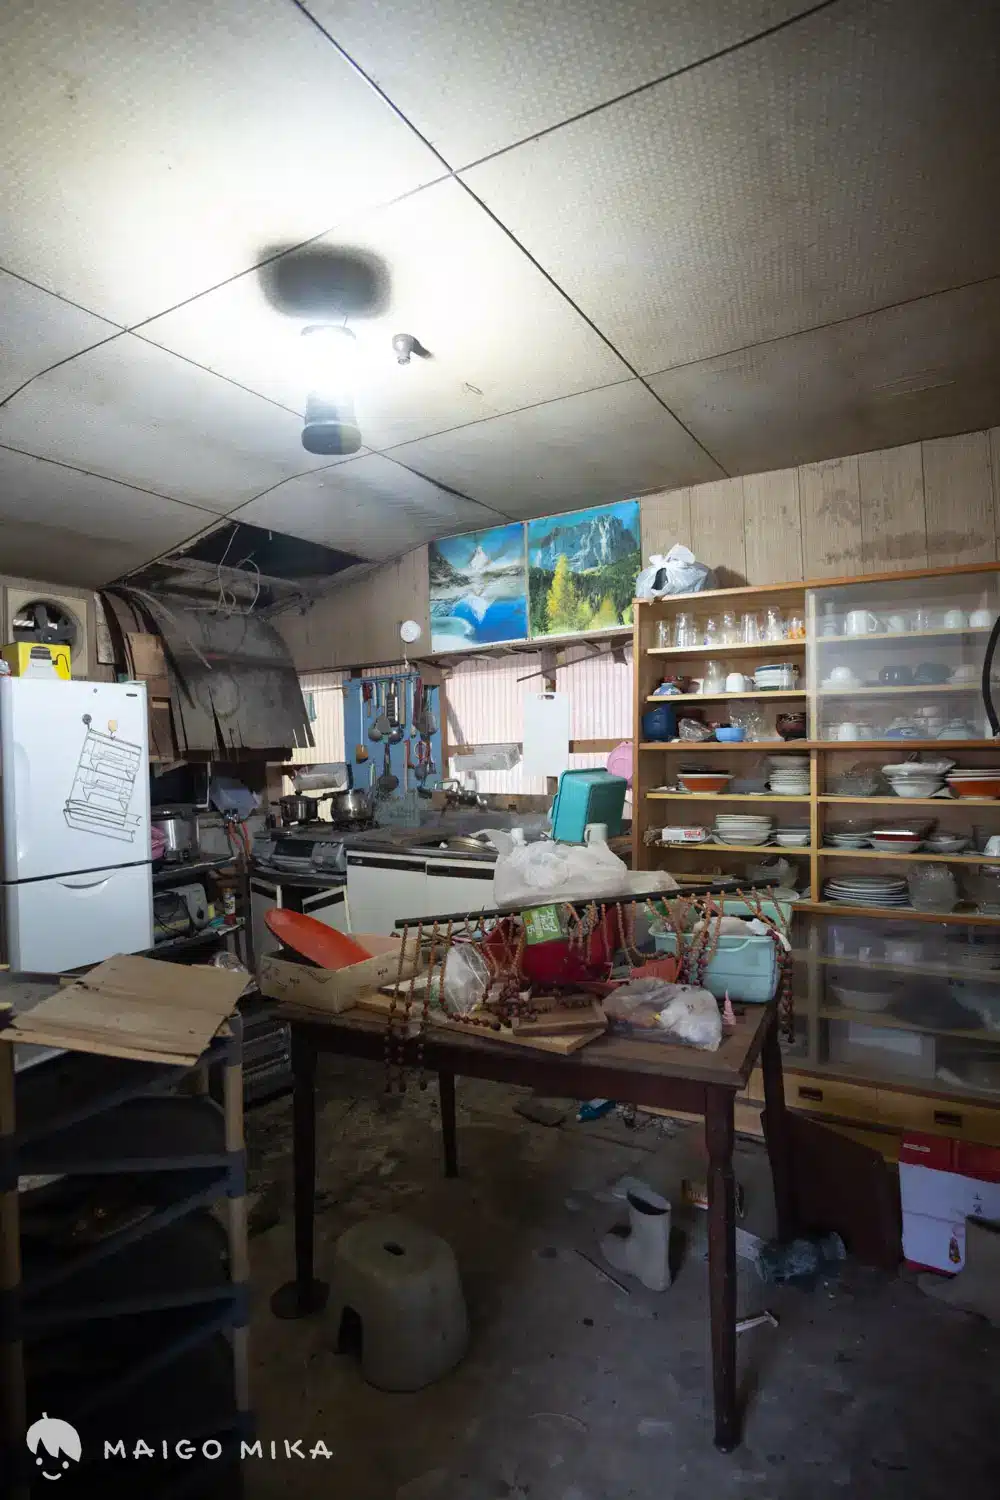
One of our first projects has been removing the ceilings. A modern ceiling had been installed beneath the original ceiling, darkened by decades of smoke from the irori hearth that once heated the home.
As we pulled everything apart, we uncovered some fascinating details. The old ceiling included wooden ventilation openings designed to help air circulate during Japan’s humid summers. Back when the house had a thatched roof, this airflow would have been especially important.
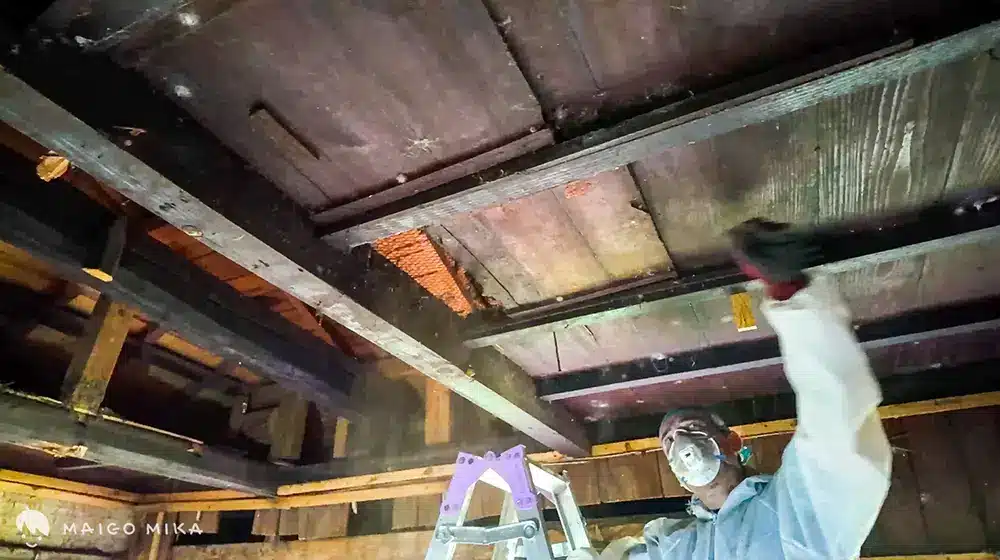
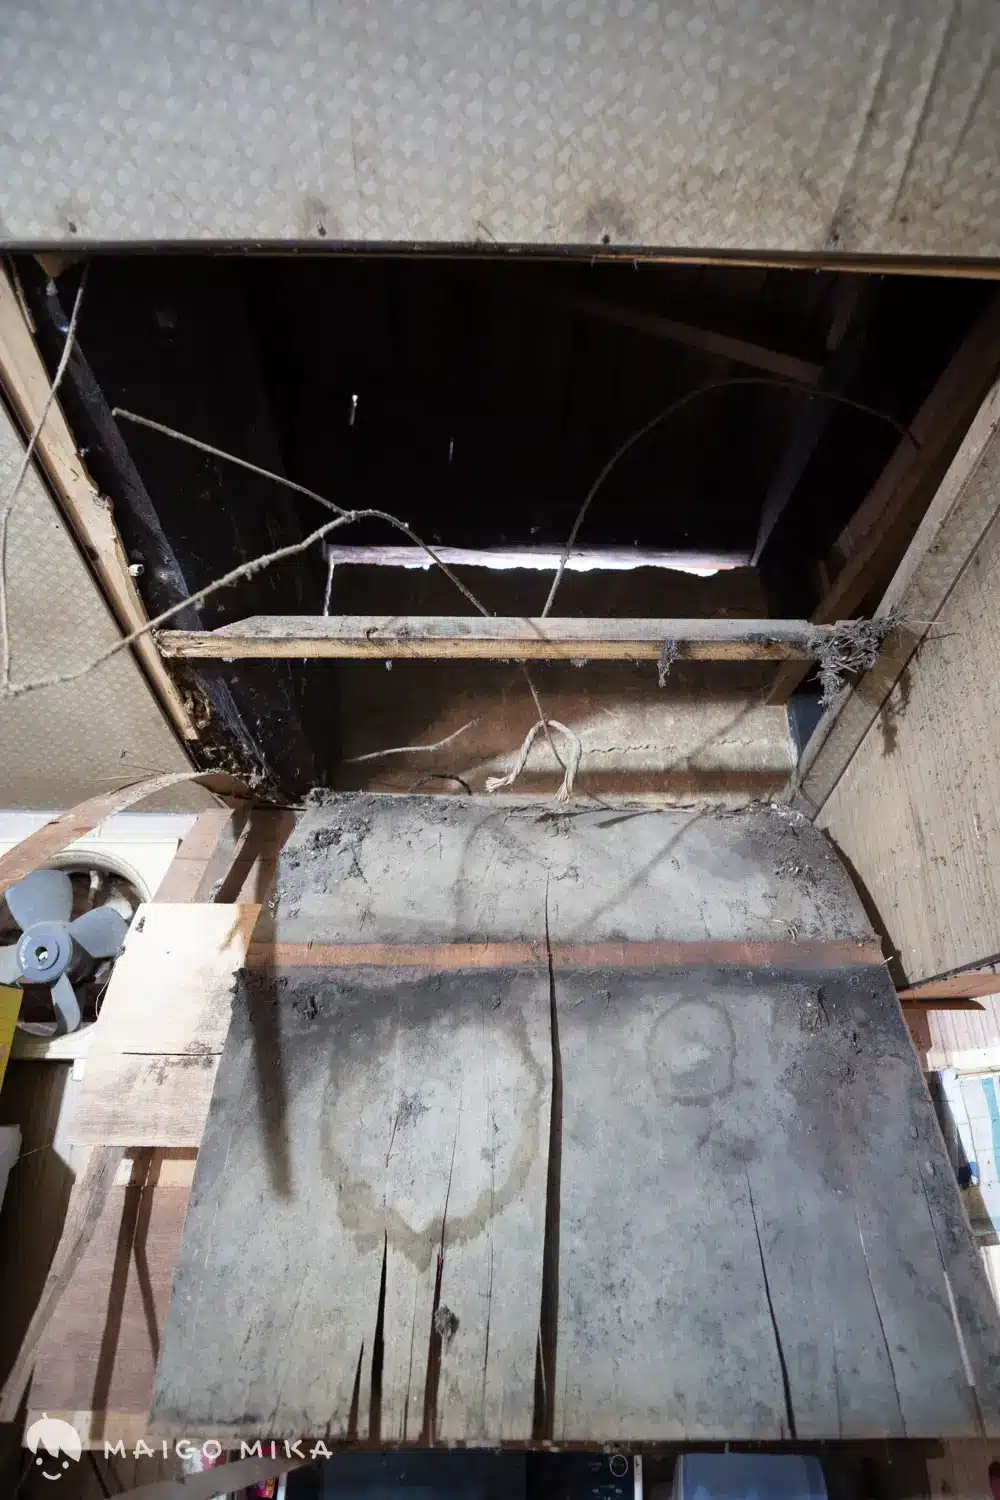
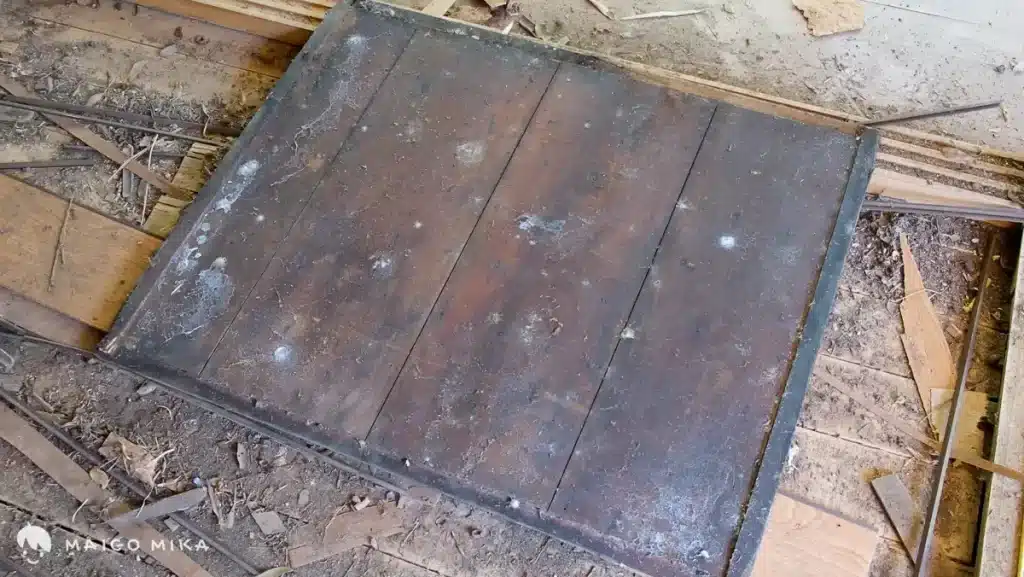
We also discovered a small hatch leading into the attic space. We’re not entirely sure what it was used for, but it’s possible the attic once housed silkworms. Raising silkworms was common in rural Japan and provided many families with an important source of income (and historically, a way to meet tax obligations).
Unfortunately, much of the old ceiling timber had been severely damaged by insects, though we managed to save the attic hatch. (If anyone has creative ideas for reusing it, I’d love to hear them!)
Other demolition and investigation work will include:
- Removing the rest of the ceilings and interior finishes
- Stripping sections of the house back to the frame
- Sorting and disposing of renovation waste
- Identifying repairs that may be needed later
- Removing the tile roof
🟡 Phase 3: Road Access & Planning
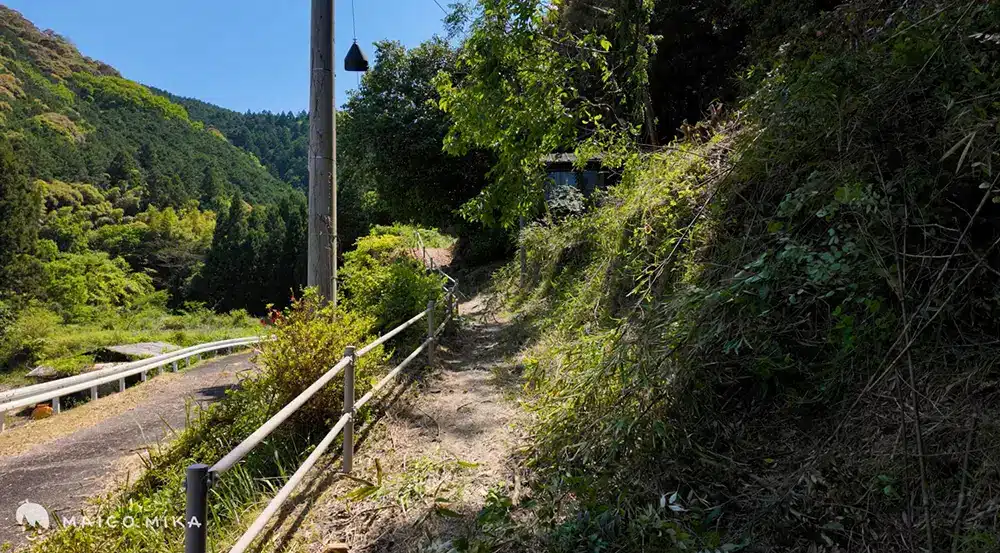
While we’ve started tearing out the ceilings in the house, we can’t begin any major structural renovation work until we solve a massive logistical challenge: road access.
Right now, the house sits on a raised terrace behind a stone retaining wall, with a narrow footpath leading up to the front door. Because the house was built roughly 150 years ago, it predates modern Japanese building standards (建築基準法, Kenchiku Kijun-hō).
Today, the law requires access roads to be wide enough for emergency and service vehicles to reach the property.
To secure future building permits for our major extensions and structural renovations, we will need to widen the access route so vehicles can reach us. We’ll also need to excavate the two tree stumps growing out of the stone wall, which will require some retaining wall engineering.
We are currently weighing a few options:
- Option A: Extend the road by moving the stone wall outward and rebuilding the retaining wall entirely.
- Option B: Constructing a cantilever-style driveway, supported by concrete pillars extending out over the slope.
- Option C: Excavating back into the property to widen the access road.
- Option D: Combine elements of Options A, B, and C.
But when I started looking into our options, what looked like a simple retaining-wall problem quickly became more complex.
After visiting the city hall and speaking with the road construction department, a city official visited the property that same day. Armed with old maps, we discovered an agricultural waterway that lined the retaining wall.
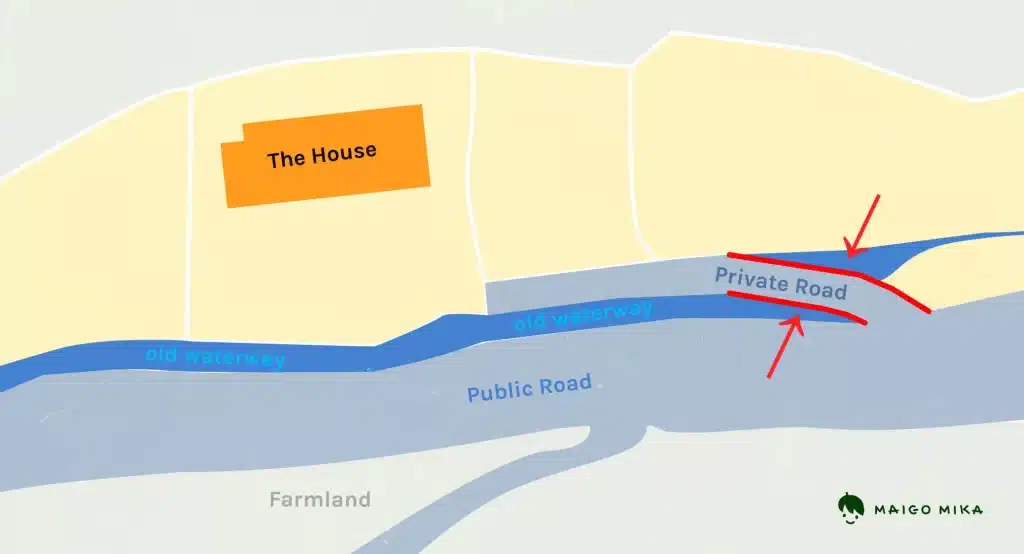
In reality, this waterway no longer exists. However, because it is still shown on official historical agricultural maps, it is legally protected to ensure local farmers have access to water for their fields. As a result, we have to be careful not to legally “disturb” this invisible waterway, adding extra city hall approvals before we can even touch the road design.
What I Learned About Road Procedures
So far, I’ve learned there are two potential paths forward.
The first is the more formal—and significantly more expensive—option. This would involve having the city acquire the land, conducting surveys, changing its designation, updating records, and eventually transferring it back.
Between surveyors, administrative fees, and the various procedures involved, the total cost could easily reach several thousand dollars.
The second option is considerably simpler.
If we proceed with either Options B, C, or D, only a small section of the former waterway would be affected. In that case, the process involves obtaining approval from three key members of the local community:
- The town chief
- A representative from the agricultural committee
- A representative from the irrigation committee
If everyone agrees, I can submit a construction notification to City Hall detailing the proposed work, who will carry it out, construction specifications, and engineering details such as the concrete thickness.
At the moment, this is the path we’re pursuing.
⚪ Phase 4: Design, Engineering & Permits
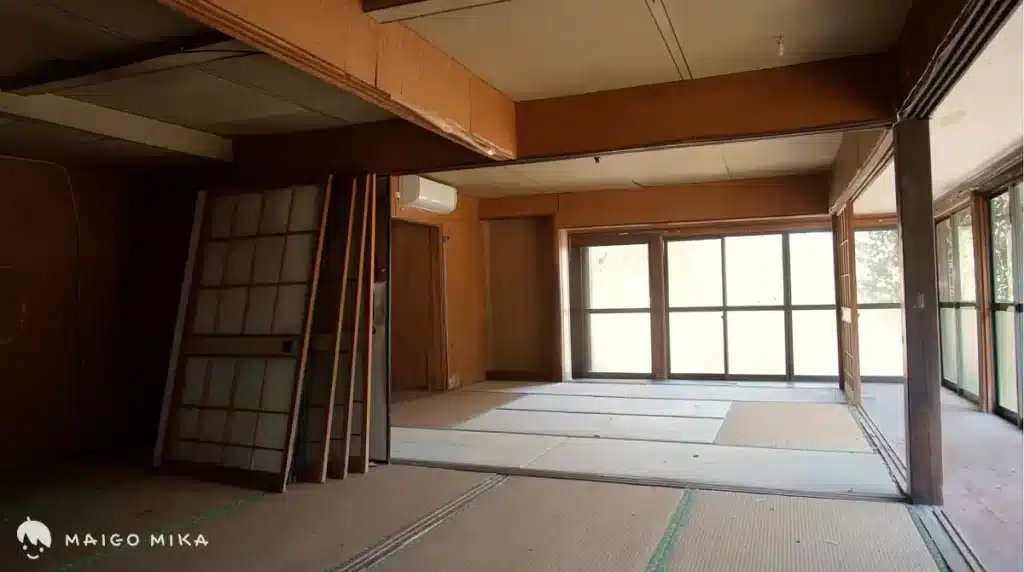
While we work to resolve the road access issue, we can still move ahead with the planning for the renovation. This includes refining the design, consulting with engineers, and mapping out the work ahead.
We’ll also be working with a structural engineer to guide the seismic retrofitting work. Earthquake resistance is one of the most important aspects of restoring a traditional wooden home, so we’ll rely on professional expertise rather than attempt a DIY approach.
However, some of our plans at this stage, including getting required permits, will need to wait until access is addressed.
What I Learned About Permits
Regarding permits for our house build: our house is a one-story wooden structure that’s just over 200㎡, some of the structural work may be affected by Japan’s updated 2025 building regulations. Exactly how these rules will apply to our project is something we’re still figuring out.
Under the old system, many smaller wooden homes were exempt from the full permit process for major renovations. The 2025 changes removed some of those exemptions, particularly for two-story houses.
For one-story homes like ours, the situation is a little less clear, especially in rural areas where requirements can sometimes be interpreted differently. We’ll need to confirm exactly what applies to our property before moving forward.
📖 I’ve covered the 2025 building code changes and permit requirements in more detail.
At this stage, we’re assuming that any significant structural work will need to meet current building standards, and we’re planning the renovation with that in mind.
Plans include:
- Septic system planning
- Water supply planning
- Electrical planning
- Structural assessment and engineer review
- Seismic retrofit design
- Permit applications
- Finalizing the floor plan
- Obtaining permits and approvals
⚪ Phase 5: Roof & Weatherproofing
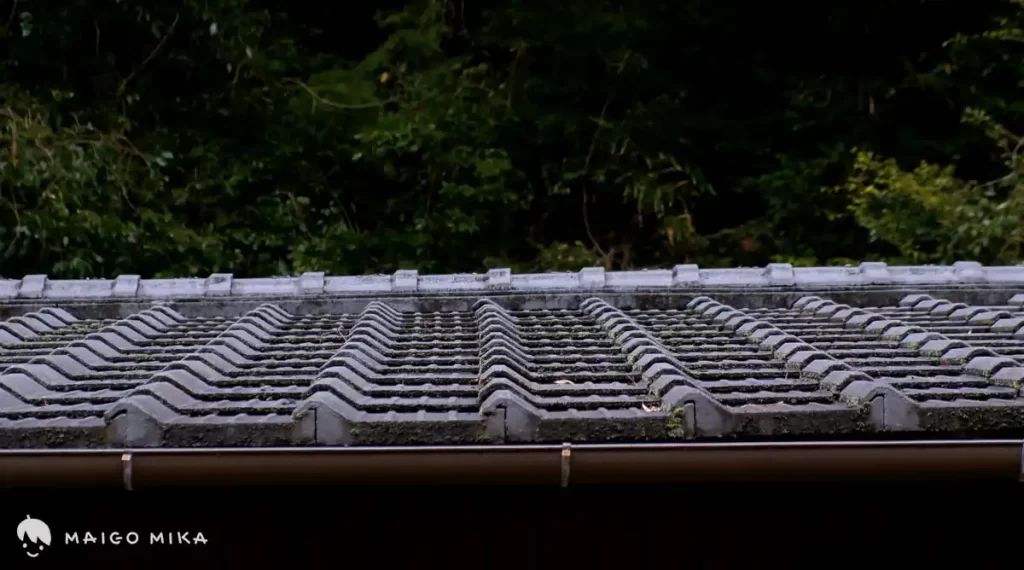
One of the biggest choices we’ll face is the roof. It will affect both the character of the house and the overall renovation budget. At the moment, we’re considering whether to go with a metal roof or invest in traditional Japanese roof tiles.
A metal roof would likely be the more budget-friendly option and place less weight on the structure. We’ve also seen some interesting modern metal roof designs that incorporate skylights or narrow light wells, bringing natural light deeper into the home, which is something we really like, while tiles would preserve more of the house’s traditional character.
We will decide once we have a better understanding of the costs and structural requirements.
Projects include:
- Exterior repairs
- Windows
- General weatherproofing
- Reinforcing structural elements
⚪ Phase 6: Structural Renovation
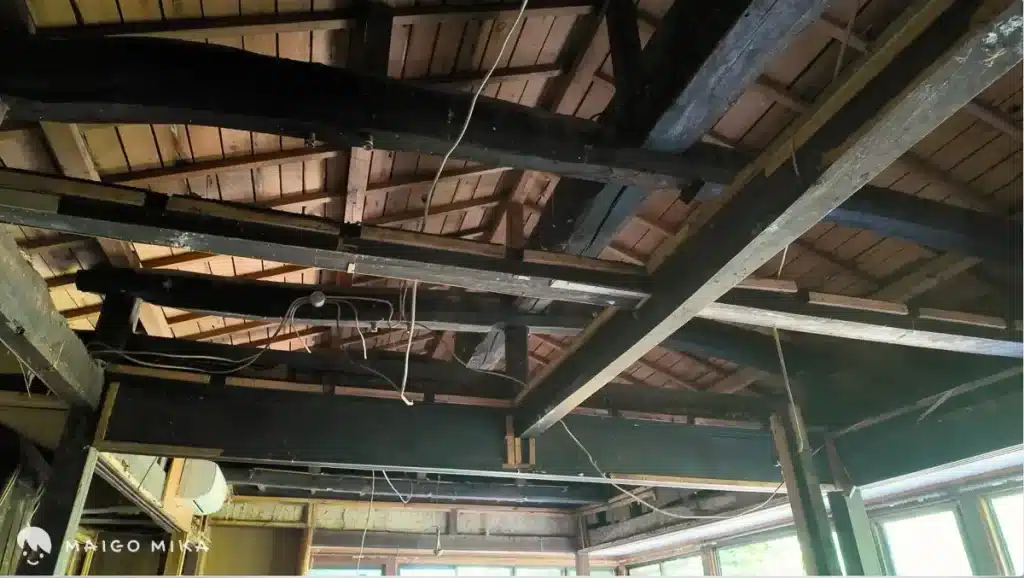
This phase will be one of the largest and most transformative parts of the entire renovation.
One of the parts of the project we’re most excited about is rebuilding and expanding the engawa. Traditional Japanese homes are designed to have a strong relationship with nature, so we’d love to bring some of that feeling back to the house.
Projects include:
- Building the planned L-shaped extension
- Carpentry and joinery work
- Rebuilding damaged sections of the engawa
- Creating a traditional doma entrance
- Flooring repairs and restoration
- Water supply upgrades
- Electrical upgrades
- Structural inspections
- Seismic retrofitting
⚪ Phase 7: Interior Finishes
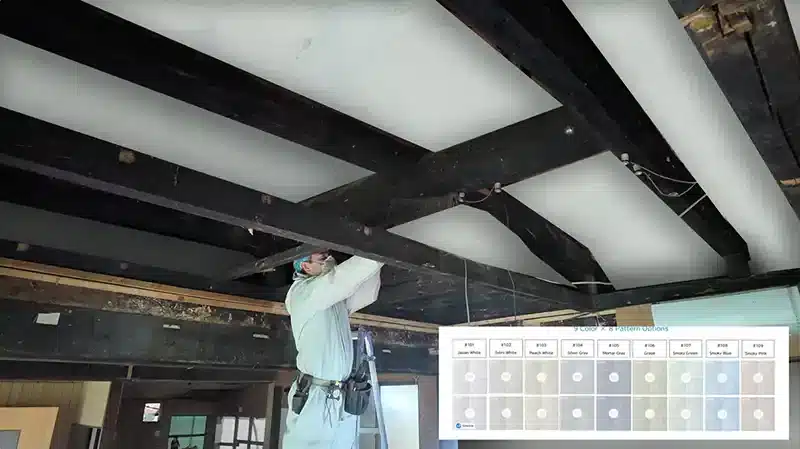
One of our goals is to preserve as many of the traditional elements as possible. We hope to keep the existing tatami rooms and have them re-covered rather than replacing them entirely.
We’re also interested in incorporating traditional finishes. In particular, I’d love to experiment with shikkui plaster, along with a mix of other natural and modern materials.
At this stage, these are still ideas, but I’ve already started putting together concept mockups of what the finished spaces might look like.
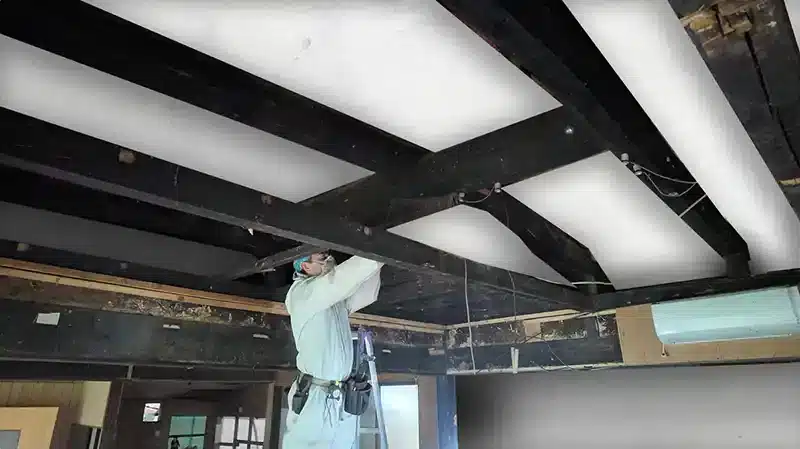
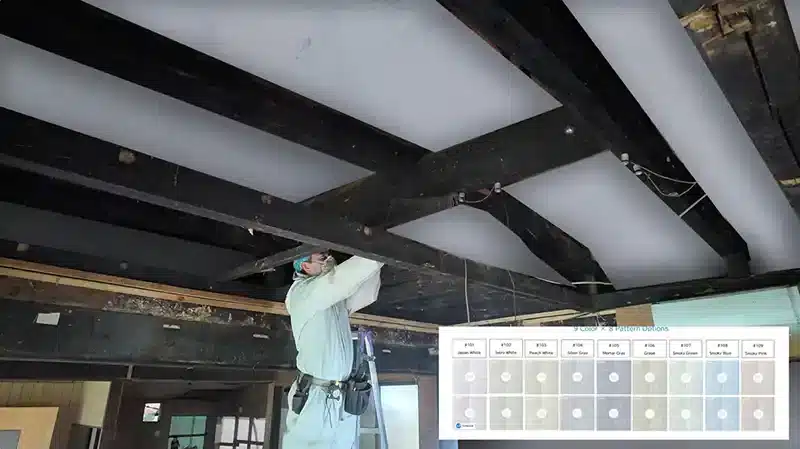
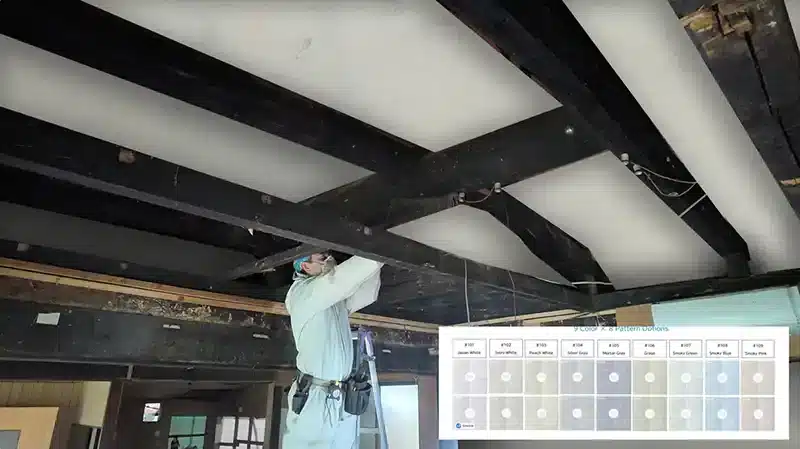
Projects include:
- Recovering or replacing tatami mat surfaces
- Insulation and interior wall construction
- Interior finishes (shikkui plaster, paint, mud wall accents, etc.)
- Lighting and electrical fixtures
- Flooring and trim work
- Interior doors, storage, and built-in features
🟡 Phase 8: Land Clearing and Agricultural Land
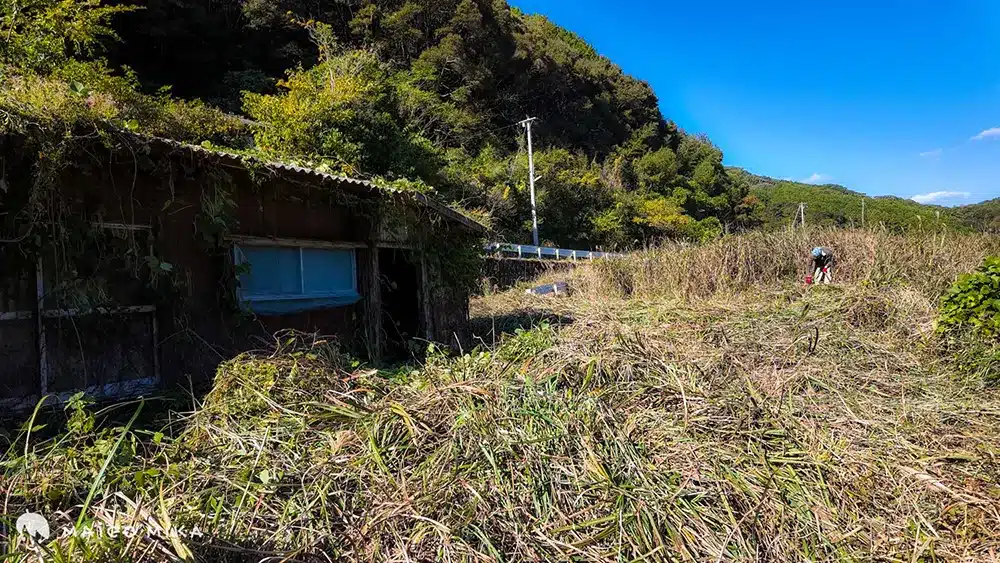
While we work on the house itself, another ongoing project is reclaiming the surrounding land.
The property includes a mix of different land categories. Most of it is registered as 原野 (genya), often translated as “wild land” or “uncultivated land.” This referred to natural areas such as grassland, shrubland, or land that wasn’t actively farmed or developed.
We also have some 山林 (sanrin), or forest land, along with a tiny 32 m² section of 雑種地 (zasshuchi), a miscellaneous category used for land that doesn’t fit neatly into other classifications.
In total, we have 2,800 m² of non-agricultural land around the house.
Although each parcel has its own official land designation, by the time we saw them, they all looked pretty similar—covered in a mix of tall grass, bamboo, and young trees after years of neglect.
Our first task has been reclaiming the land itself.
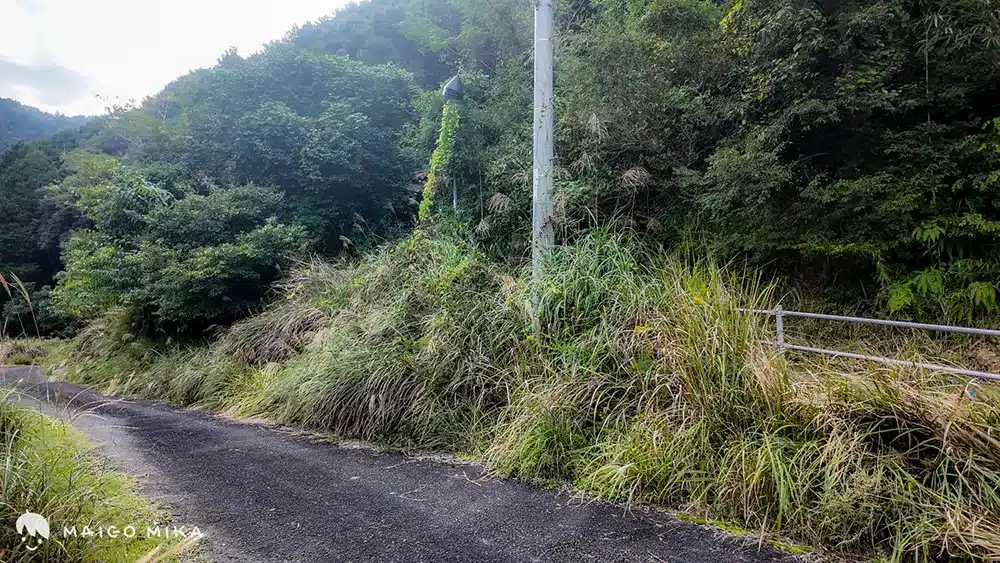
So far, we’ve cut back heavy grass, sasa bamboo, and climbing vines that had taken over much of the land.
The result is a rather impressive pile of vegetation that now needs to be processed and removed.
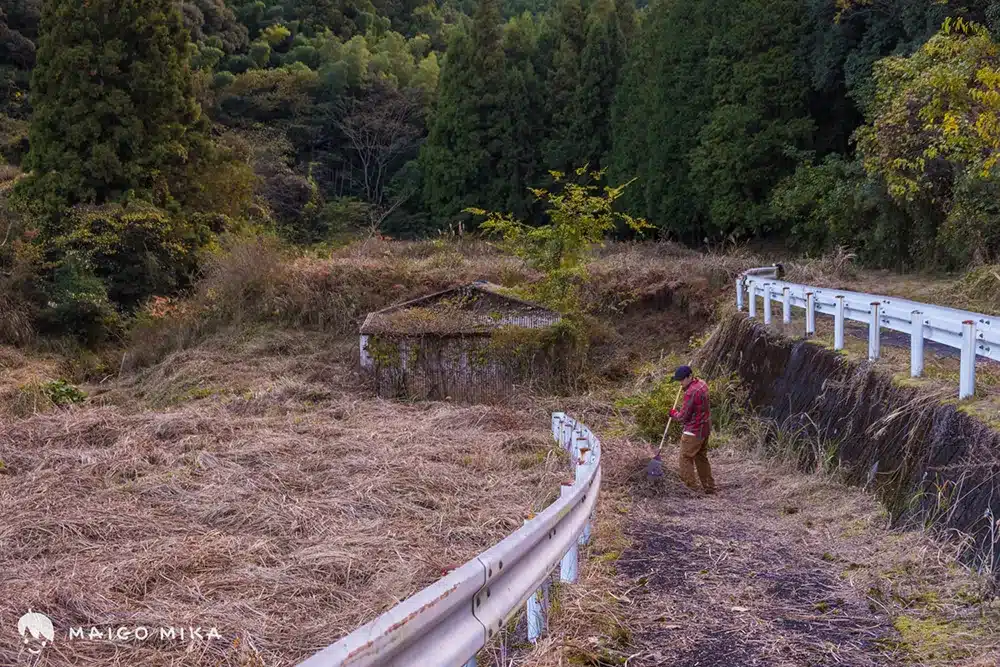
We also have about 2,100 m² of agricultural land associated with the property. Because of our current residency status, we cannot own this farmland directly, so instead we lease it.
📖 Read about the restrictions on purchasing farmland as a foreigner
Japan heavily protects agricultural land, and both owners and renters are expected to keep it in productive use. During my first meeting with the local agricultural committee, they explained the requirements, helped me complete the paperwork, and were surprisingly welcoming throughout the process. My impression was that they genuinely wanted to see the land cared for and brought back into production.
Over the next few months, our goal is to restore the fields and begin growing vegetables. Long-term, we’d love to plant fruit trees and gradually expand into a small orchard.
As for disposal, we had considered the burning regulations in Japan. Open burning is generally prohibited in urban and suburban areas, but agricultural communities often have more flexibility, particularly when they get permission from the local fire department.
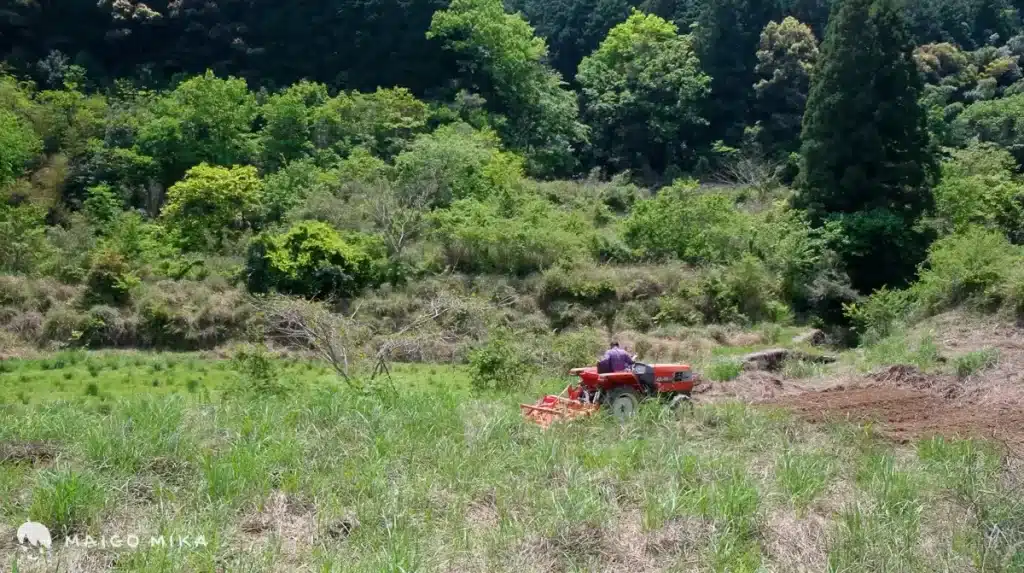
After some thought, though, we decided to take the slower route. Rather than burning everything, we’ll rent a wood chipper for the larger branches and woody material. The grass and other softer vegetation will gradually be worked back into the soil. We even had one of our neighbors stop by with his tractor and help turn over part of the field.
What I Learned About Farmland
I learned that not all farmland is treated equally.
Prime agricultural land—large, accessible, rectangular plots that are easy to farm—is often subject to even stricter oversight because it is highly desirable for agricultural production.
Our plots are smaller, irregularly shaped, and somewhat difficult to access, which seems to give us a bit more flexibility in how we approach the project.
I also learned that one of our early ideas—planting flowers primarily for pollinators—falls into a gray area when it comes to meeting agricultural use requirements. To avoid any issues, we’re planning to focus on vegetables and other crops that clearly satisfy the intent of the regulations.
Like the house itself, this will likely be a project that continues for many years. My hope is that as the house slowly comes back to life, the surrounding fields and orchard will grow alongside it.
Of course, this is the plan today. Ask us again in six months, and it may look completely different! That’s part of the adventure of restoring a 150-year-old house.
We’re still at the beginning of a long road to restoring our house, but hopefully there will be plenty of rewarding moments along the way.
The cleanup is finished, demolition has begun, and we’re now tackling one of our biggest hurdles of this project: road access.
If we can solve that challenge, the real transformation can begin.
I’ll continue updating this page with progress reports, renovation costs, mistakes, and lessons learned as we bring this 150-year-old house back to life. One project at a time, we’re working to give this old akiya a new future.
Thanks for following along!
🔖 Bookmark this page and check back for the latest updates, and check out my cost tracker for the latest details on our renovation costs.
Frequently Asked Questions
Yes. Foreigners can legally buy and renovate property in Japan, including akiya and kominka. Larger renovations will still require permits and approvals.
We’re not working to a strict timeline, but we expect the house, road access, and farmland projects to take at least 2–3 years.
Sometimes. Cosmetic work often doesn’t require permits, but larger renovations involving structural changes, extensions, or major alterations may require permits and inspections. Since 2025, many two-story wooden homes that previously qualified for simplified treatment now require permit applications and structural reviews for major renovation work.
Road access is important not only for construction but also to ensure that emergency vehicles can reach the property when needed. Under Japan’s Building Standards Act, residential lots generally must connect to a road that meets minimum width requirements.
Not as easily as you can in Canada or the United States. We had to make repeated trips to the local waste facility instead.
Generally, no. Agricultural land ownership is heavily regulated in Japan and typically requires approval from the local agricultural committee. In our case, we rent the surrounding farmland and are required to keep it in productive agricultural use.
It depends on the location. Open burning is often restricted, though agricultural areas may allow it with permission from the local fire department.
We’ll chip the larger branches, compost what we can, and return much of the material back to the soil.
Our focus will initially be on vegetables, with plans to add fruit trees and gradually develop a small orchard.