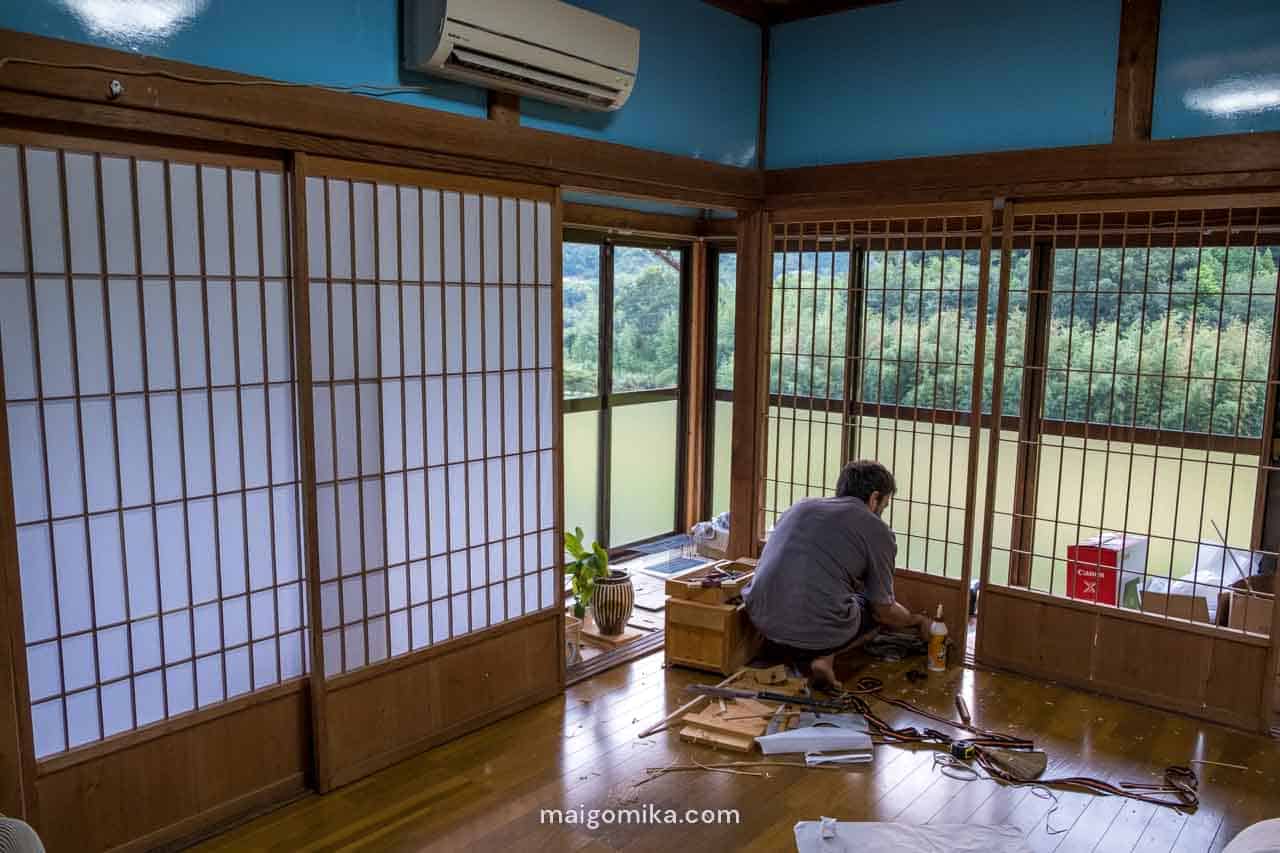
If you’ve been following me on my Instagram account, you’d have noticed our recent preoccupation with our screen door restoration project. Nothing quite screams “abandoned haunted-house-y akiya home,” like 15 ratty shoji (障子, shōji) sliding doors with mothball-eaten paper and a light smattering of rodent poop for your living room walls. 🐭💩
In fact, up until the last shoji screen was installed, we were living in a conspicuous fish bowl — pleasant during the day with the morning light, but way too public at night, our indoor lights projecting our living space like a giant movie screen for the neighbourhood to see. So, as soon as we found a sunny weekend, we pulled them from their temporary storage on our covered balcony to get them back into shape. Or, in our case, four weekends’ worth of scraping off the ancient-old paper, gluing rickety frames, repairing fiddly slates, and repapering 15 doors.
Here’s how we transformed our lovely haunted house into a lovely stylish Japanese home:
How We Repaired Our Japanese Shoji Screen Doors
Like all akiya houses in Japan, not all screen doors can be treated equally, requiring different amounts of restoration work depending on age, wood quality, and how much you can salvage. Four of our 15 doors were a recent addition to the house, requiring no more than a wash and a fresh layer of paper to make them look brand-spanking new. Unfortunately, the remaining doors were in a bit of a sorry state, much older, much more shattered, with bits of tape and string holding together the broken slates.


Good sources (our neighbours) tell us that the house is at least 80 years old, so I’d hazard a guess and assume these older doors are nearly the same age. Jesse and I like to joke and imagine the two brothers — our current landlords and previous house residents — engaging in youthful brotherly battles that ended with them crashing through these doors. With the broken slates patched up as it was, it certainly looked like it.
Japanese Screen Door Supplies
Luckily, being in Japan, almost all hardware stores carry the basic necessities to repair any number of screen doors in Japan. For anyone curious, here’s a quick list of supplies we used to repair our shoji screen doors:
- Wheat Glue or shoji screen tape
- Gorilla glue
- Bucket and sponge or gentle spray setting on the hose
- Hammer
- Ratchet Straps
- Exacto Knife
- Ruler
- Plastic Scraper (to remove old paper)
- Shoji Screen Paper
- Extra slates (required for repairing broken slates)
- Woodworking tools such as a chisel and fine saw


Your local hardware store may also carry shoji screen repair kit sets that bundle various items. Depending on the state of your screen doors, you may require fewer or extra supplies for your shoji restoration. For us, we needed to re-glue most of our frames and replace some of the finer slates, needing a few extras like wood carving tools to help complete our restoration process.
Remove the Old Paper
Traditional shoji paper screens are glued with water-soluble wheat glue, and these doors in our 80+-year-old house were no different. One recommended way I’ve found online is to remove the paper with a wet sponge, then gently scrape the residue glue and paper with a plastic scraper. I’m no expert, but I found that the gentle mist setting on the hose worked equally well (and much faster, I might add, appropriate for impatient personalities such as myself.) After cleaning, we purposely left the doors in the sun to dry for a few hours before returning them to the shade.


Re-glue and Replace Shoji Slates and Frame
Next was to ensure that the frames were square. This required hammering out the main structure, gluing the main slates together, and strapping them into 90-degree corner angles. After drying, we peeled off any remaining tape and string used to hold the fragile inner slates together over the years.


Due to their shattered states, these required the most patience to complete, needing extra slates from the hardware store, proper woodcarving tools, and a wood carvers touch. If it were up to me, I’d have left the slates broken and repapered the screens, though luckily, Jesse insisted on doing the work. At the end of the day, I doubt we would have gotten our final effect without replacing our broken slates.
Re-paper Shoji Screens
Finally was the repapering. I experimented with double-sided tape for shoji screens and Japanese nori paper paste to glue down the paper. While the double-sided tape requires less clean-up, I found it less forgiving to error. Once the paper touched the tape, that was it; no shifting or repositioning of the shoji screen after that!


In the end, I prefer the nori glue method. This particular glue came with a guided tip, meaning I didn’t have to resort to using the brush-on glue method. In addition, you can quickly get replacement glue from the hardware store when you run out, though some may require mixing with water before use. (Nothing that a little whisk and macgyvered-paper funnel to pipe the glue back into the bottle can’t fix.)

And that’s it! After reinstalling the doors, we ended with a sealed living room-bedroom that keeps air-conditioned air in, and curious eyes out at night. While the work was especially tedious for the older doors, it was well worth the effort to transform our fish bowl into our very own Japanese tea house.
Until next time my friends!


Hello, you have a new fan of your channel hehe, and I have a question about the Japanese Shoji, do they have paper on both sides? And in cold climates do they maintain the temperature?
Hello Julio, thank you for reaching out! The shoji screens have paper on one side, and don’t retain any heat during the winter. 🙁
I repapered 2 shoji in 1984. At that time, there was a step after the paper was glued and trimmed, when I misted water from a spray bottle all over the paper. One the paper dried, it was tight like a drum. Did you do this step? Or does the new material not require this step?
Hey there, HCATmike! To be honest, I’m not quite sure. Our paper tends to change shape based on the humidity in the air. During the rainy season, it becomes more wrinkly, and during the dry season, it’s more taut. There’s a type of shoji paper that can be tightened using a blow dryer, but we used the basic kind. Maybe we can give it a try during our next shoji repair day!