My very first umeboshi (梅干し) batch in Japan was… a bit of a disaster.
When I opened the container after weeks of letting the fruit sit in its brine, a foul, septic smell reached my nose. Tiny worms and flies confirmed my fear: my umeboshi batch had failed.
And to add salt to the wound, I knew exactly why. In my eagerness to get started, I rushed the sanitation process and failed to properly prepare the fruit.
Fortunately, that failed batch taught me some valuable lessons. The following year, armed with a bumper crop of ume from our backyard tree and advice from our neighbours, I tried again.
This guide follows that journey—from harvesting ume and making traditional umeboshi to experimenting with umeshu, syrup, jam, and even a few unconventional fruits along the way.

When to Pick Ume
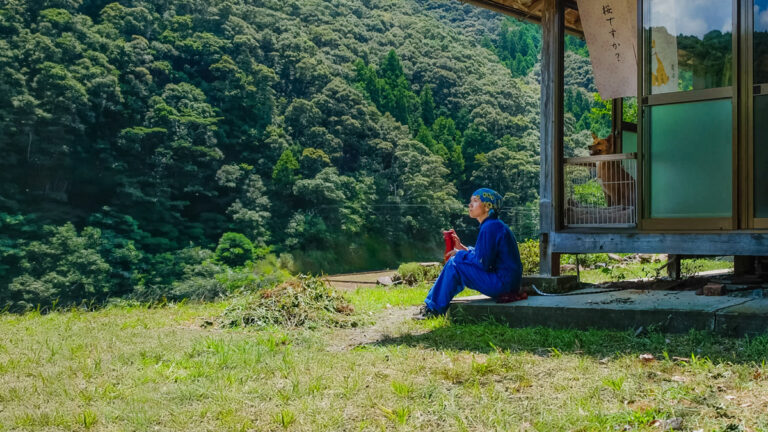
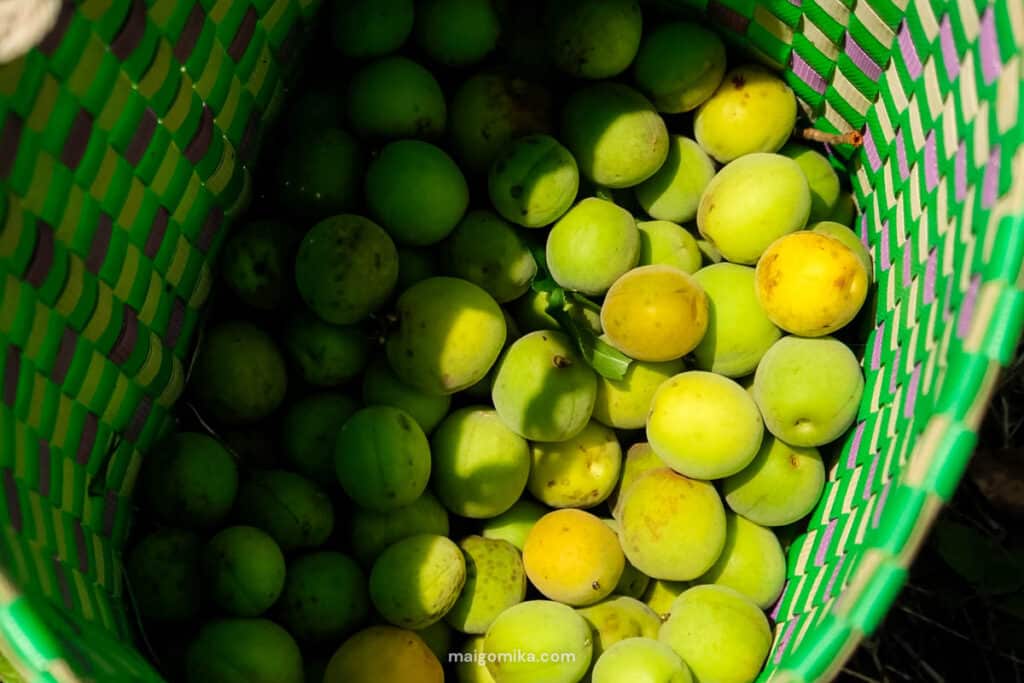
Our ume journey began with the harvest. Ume picking season typically runs from late May into early July.
After losing most of last year’s harvest to monkeys (a rare occurrence, since ume are usually too tart for them), I was determined to make the most of this season’s fruit.
Between an early summer heatwave and the tree’s awkward location, it took me several early mornings to gather the entire harvest.
At first, I tried using extended pole cutters to reach the higher branches, giving them a good shake to release the fruit. Unfortunately, ume bruise easily, and I quickly discovered that dropping them ten feet to the ground was not an ideal harvesting method.
Instead, I took a more direct approach—climbing into the tree myself like one of the monkeys that had pillaged it the year before.
If you’re making umeboshi or umeshu, the timing of the harvest depends on what you plan to make:
For Umeshu (Plum Wine): Pick the fruit in early June while it is still firm and green. Their unripe tartness is what gives umeshu its distinct flavor.
For Umeboshi (Pickled Plums): Allow the fruit to ripen on the tree and collect it once it begins to naturally fall, usually from mid-June to early July. These ripe plums are softer and have a sweet, apricot-like aroma, which is perfect for pickling.
How to Clean Ume
Once harvested, these tart fruits are ready for their transformation. Whether you’re making umeboshi, umeshu, syrup, or jam, the cleaning preparation steps are largely the same:
- Washing: Thoroughly rinse the ume under cold running water to remove any dirt, dust, or debris.
- Selection: Sort through the fruit, keeping only fresh, firm ume and setting aside any that are bruised, damaged, or showing signs of mold.
- Removing the Stems (Heso/Heta): Using a toothpick or bamboo skewer, gently remove the small dark stem from each fruit.
- Drying: After washing and destemming, spread the ume on a clean towel and allow them to air-dry completely, or gently pat them dry with a clean cloth. Any excess moisture can increase the risk of spoilage during processing.
For extra insurance, I also like to give the fruit a quick rinse with high-proof clear alcohol before using it.
Making Our Umeboshi
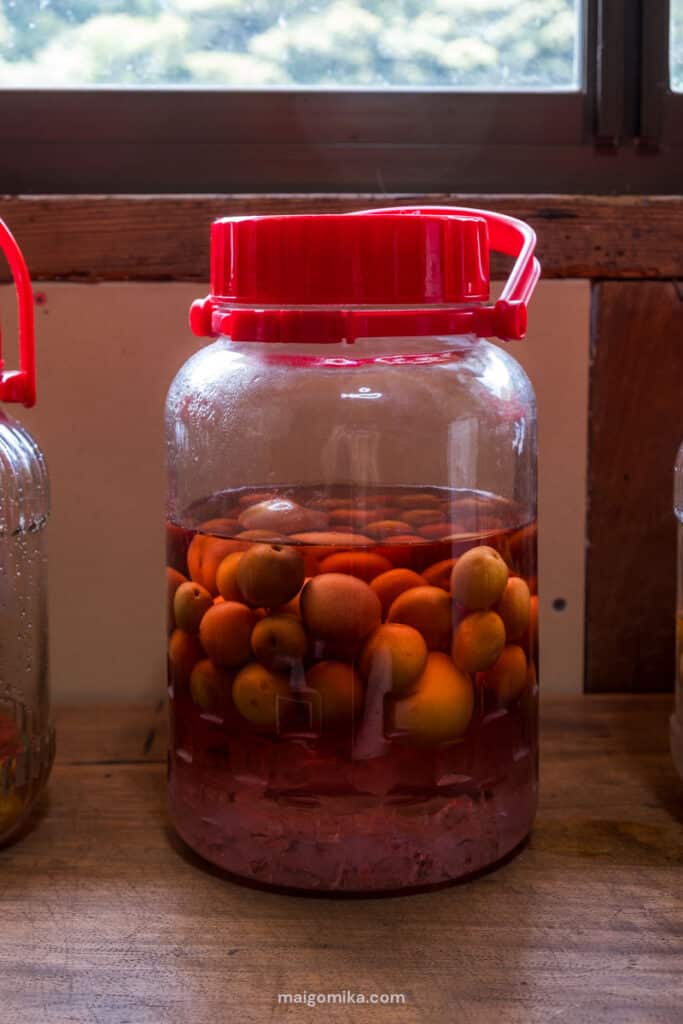
For this batch, I followed a method shared by one of my neighbours: one kilogram of ume to 200 grams of salt.
After sanitizing the container, I alternated layers of ume and salt before placing a weight on top. Within a few days, the fruit began releasing its juices, gradually forming enough umezu to completely cover the plums.
One tip I learned from a local was not to be too quick to discard damaged fruit. While many recipes recommend removing any ume with broken skins, she simply pickles them alongside the rest and keeps a close eye on the batch.
It’s a slightly riskier approach that requires regular inspections for mold, but it can be a good way to reduce waste if you’re comfortable monitoring the container closely.
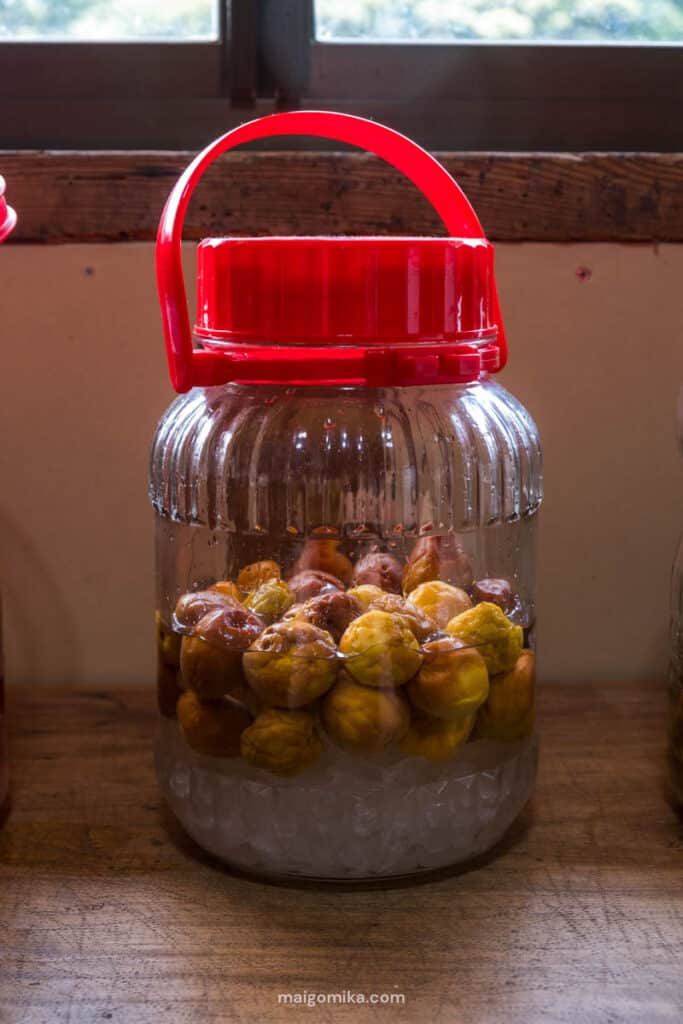
Several weeks later, once enough umezu had formed, it was time to add the shiso. Fortunately, our shiso plants were finally ready for harvest.
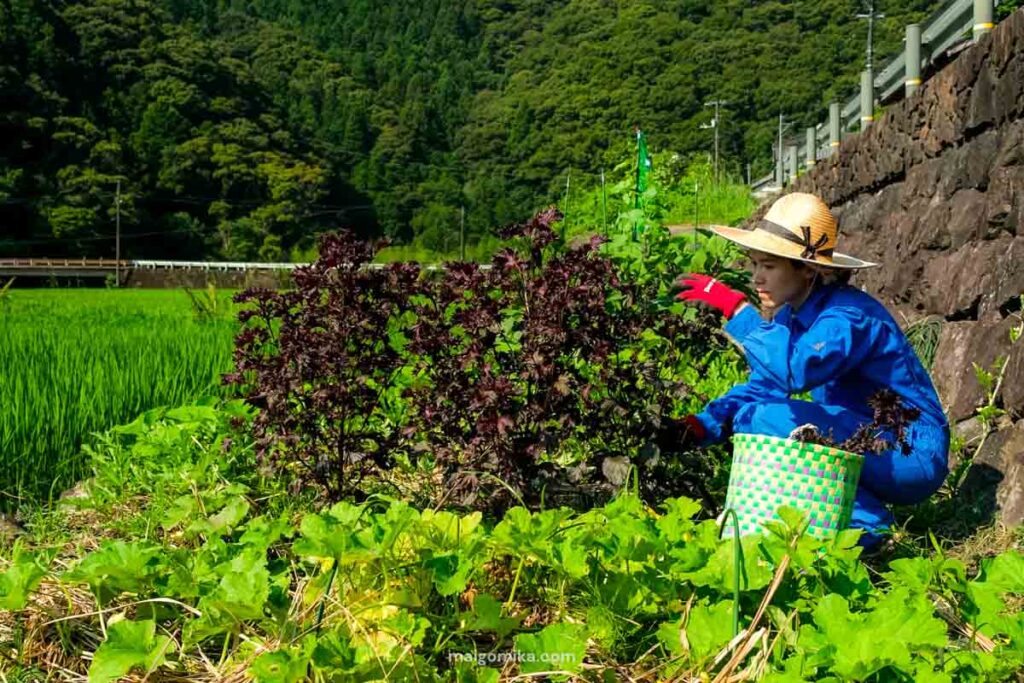
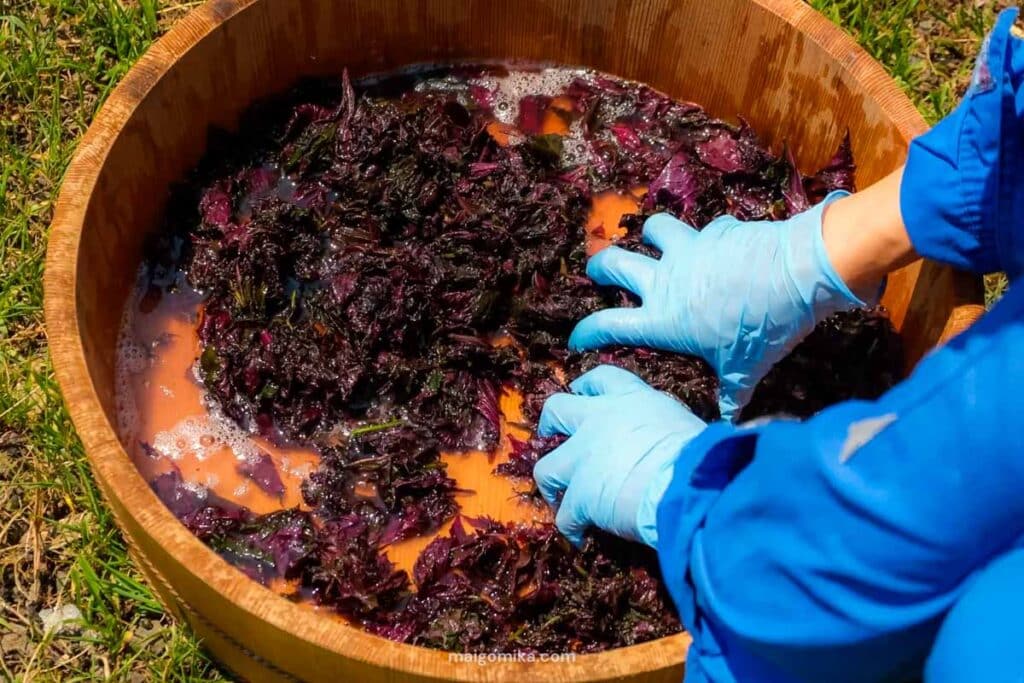
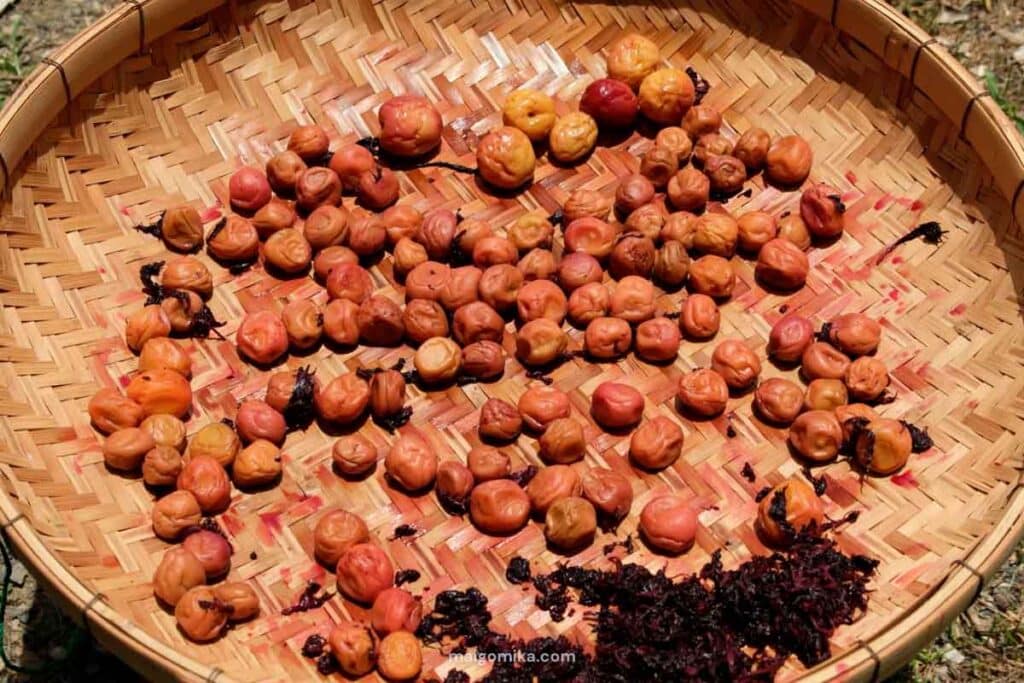
To prepare the leaves, I rinsed them thoroughly and worked them with salt, squeezing them repeatedly until they released their deep purple juices. Once the ume were fully submerged in their brine, I layered the prepared shiso on top and left everything to infuse.
The final step was sun-drying the umeboshi. Sundrying, or doyo-boshi (土用干し) is often the last traditional step in making umeboshi, but isn’t strictly necessary. One of our neighbours gifted us a undried-umeboshi batch made from our own harvest to taste. I personally prefer the dried version, since the sun mellows some of the sharp sourness of the fruit, but it was interesting to taste the subtle differences between the two.
Experimenting with Other Plums

My first attempts at making umeboshi in Canada came with an immediate challenge: classic ume plums weren’t easy to find.
Instead, I worked with what was available: sweet table apricots. After letting them sit in their salty brine for months, I finally opened our experimental batch. I still remember them vividly: plush, hacky-sack-sized fruits in bright yellows and oranges, plump with salty, syrupy juices.
They weren’t exactly the conventional umeboshi you might find in a grocery store or a local cook’s kitchen in Japan, but to this day my mouth waters at the thought of those delicious “non-umeboshi umeboshi.”
Those early experiments taught me that there’s plenty of room to play around with umeboshi. With that lesson in mind, I couldn’t resist trying a few variations alongside our traditional batch this year.
Alongside our traditional umeboshi, I also made a batch using sumomo (スモモ) to see how they would compare.
After weeks of brining, with the shiso doing its magic and the sun-drying complete, it was finally time for the taste test.
Our sun-dried umeboshi turned out the best. They had a perfect puckered texture and an intense flavor, with soft skins that were easy to bite through.
The non-dried version, on the other hand, was slightly crisper and retained more of its original fleshy texture.
We also sampled our sumomo plum umeboshi. My husband wasn’t a fan, but I loved them. They were denser and firmer than traditional umeboshi, with a tart flavor that packed an even bigger salty punch.
I suppose that’s part of the fun of experimenting. Everyone’s tastes are different, and sometimes nostalgia ends up being the most important ingredient of all.
Mistakes That Ruined My First Batch
My first batch may have been a complete failure, but it taught me a few lessons that made all the difference the second time around:
- Diligence in Cleaning: My first batch failed because I rushed the cleaning process. Thoroughly rinsing the ume and sanitizing the container with alcohol made a huge difference.
- Regular Checking: Don’t assume everything is fine and leave the batch unattended for weeks. Daily checks helped me catch problems before they became disasters.
- Secure Sealing: I suspect insects entered my first batch through gaps in the lid. Wrapping the container with a cloth and elastic band gave me some extra protection.
What I Used to Make Umeboshi
If you’d like to try making your own batch, these are the tools and supplies I found most useful.
Pickling Containers
I used a common brown crockpot, which can be found in any Japanese hardware or kitchen store, but any wide-mouth glass jar or plastic tub will work well. The key is to have a wide mouth so that it is easier to slide a weight in and out as you check your umeboshi. For any container, store it in a cool, dark location.
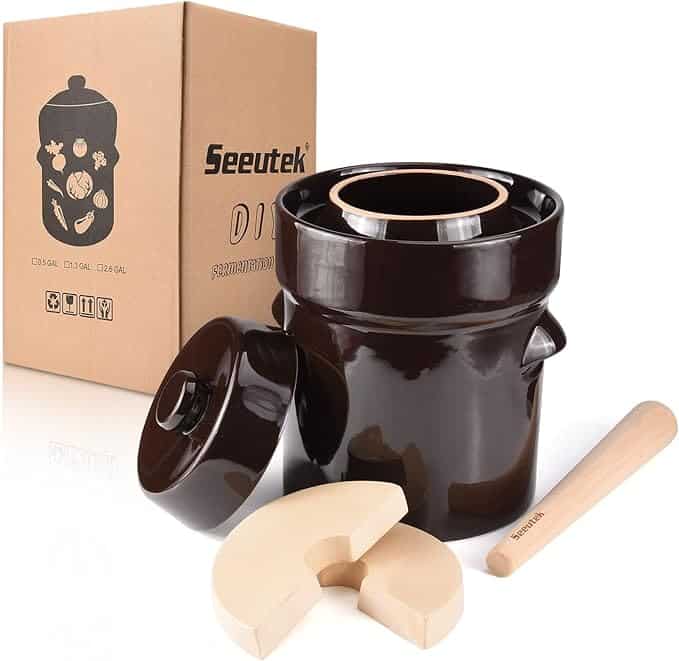
This Seeutek fermentation crock is a bit of a splurge, but they’re great because it comes with its own weights, perfectly sized to fit the jar.
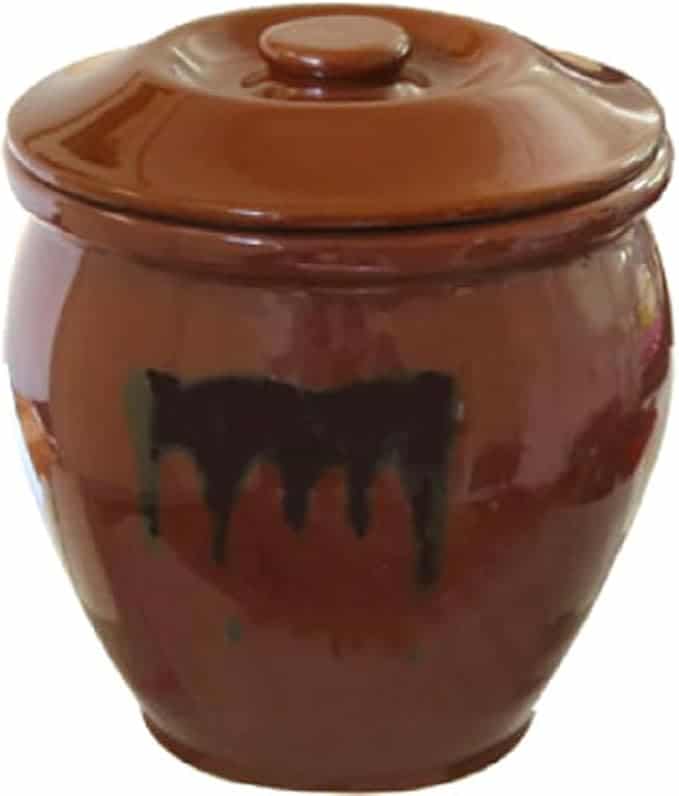
If you’re in Japan, you’ll see this kind of ceramic jar everywhere. It’s a classic for a reason—it’s a staple for all sorts of pickling projects, not just umeboshi.
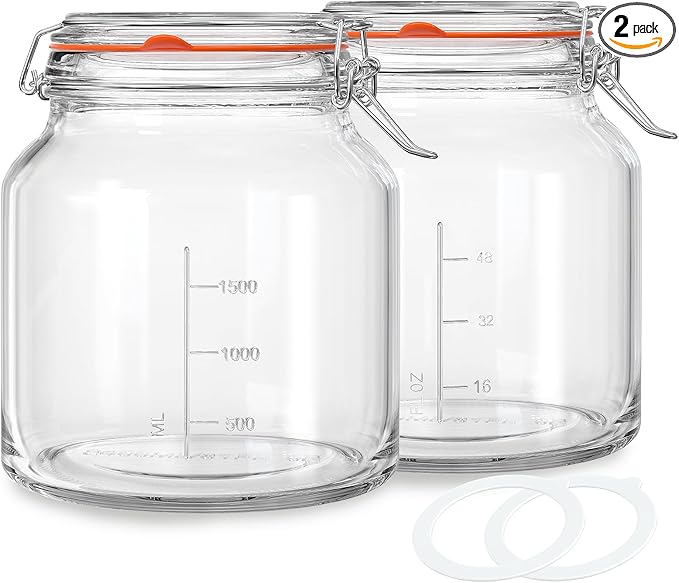
These 79-oz mason glass jars are a fantastic two-in-one option. The wide mouth makes it easy to add the plums and weights, and once you’re done, they double as perfect storage containers.
Pickling Weights
Weights are very useful, especially for beginners who are concerned about one piece of fruit not being fully submerged and potentially infecting the rest of the batch. In Japan, you can even buy foldable plastic plates so that it evenly distribute the pressure when a weight is placed on top. You can find specialized glass, ceramic, or plastic weights, or simply use a heavy jar or cup that you already have at home.
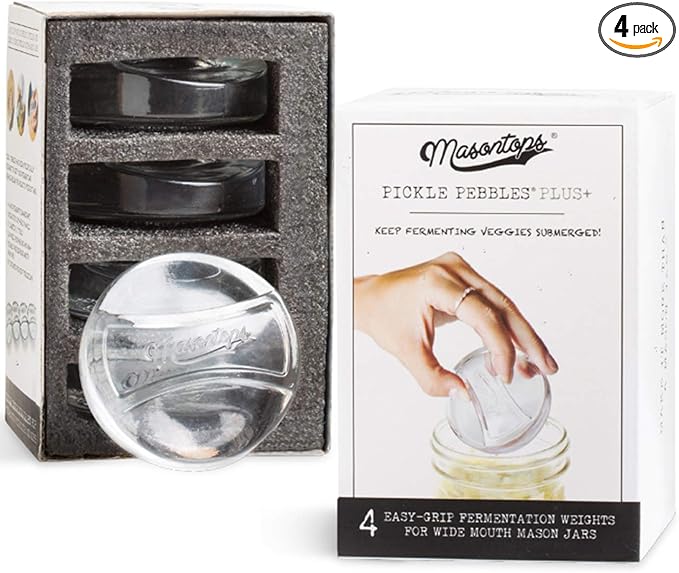
These Masontops Pickle Pebble Glass weights are specifically designed to fit inside mason jars, making them incredibly easy to use and clean.
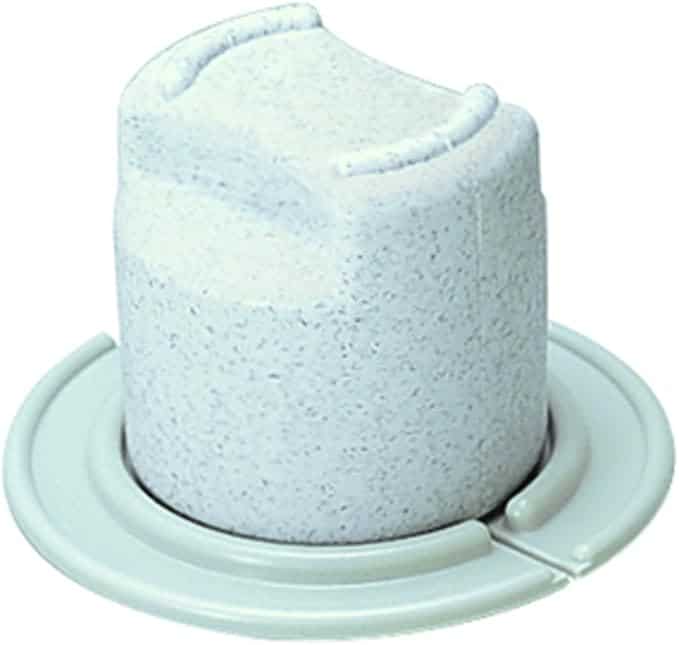
These pickle presses are a very common weight found in Japan. They often come filled with sand and sometimes include a separate flattening plate to help you distribute the weight more evenly over the plums.
Drying Tray
This can be a plate or a bamboo tray. Bamboo trays are great because they allow for better airflow, which helps the plums dry more evenly, and lay relatively flat. If you use a plate, just remember to turn the plums regularly. You can also find trays that come with covers, which are perfect for keeping bugs off your precious plums.
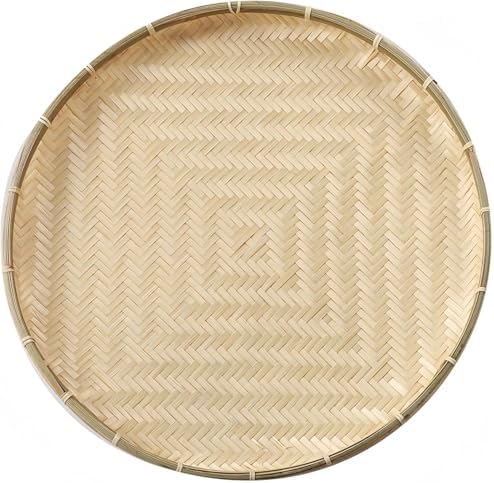
These bamboo trays are standard in Japan, and they’re a great way to dry your umeboshi because they allow for good airflow.
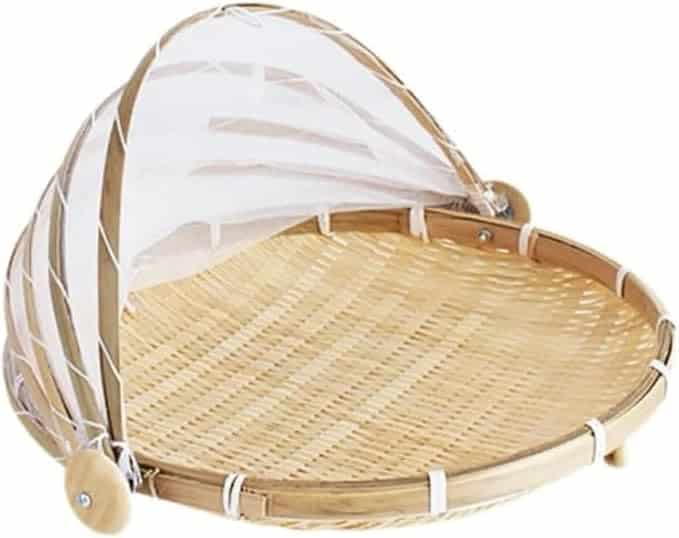
A less common bamboo tray in Japan, with a mesh cover to protect your umeboshi from bugs.
Storage Jars
To store your finished umeboshi, you can use any jar with a lid. I used mason jars with the two-part lid (a flat lid and a screw-on band) because they create an airtight seal, and also allow you to reuse the band for future pickling projects.
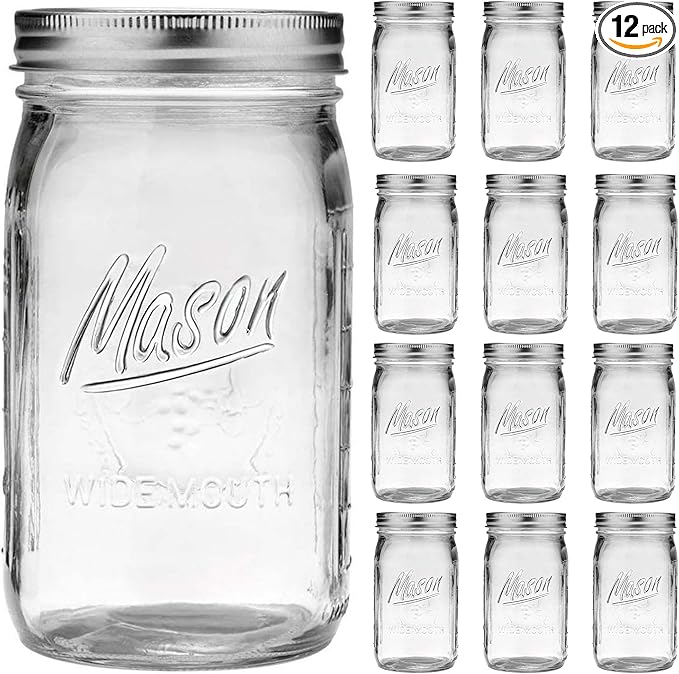
Wide-mouth mason jars with airtight lids — perfect for storing umeboshi, and canning for future pickling/canning projects.
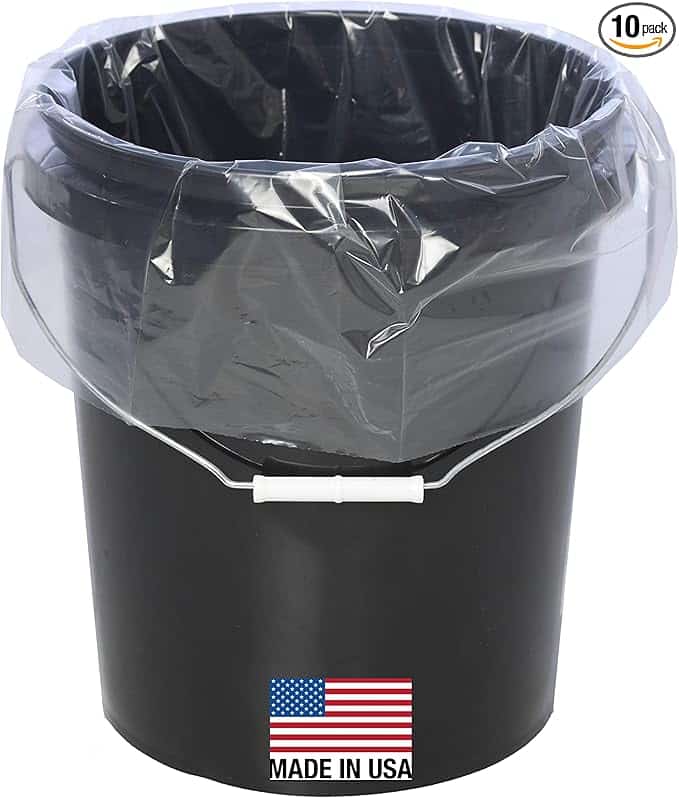
While pickling bags are optional, one of my neighbors highly recommends using plastic bags specifically designed for pickling. If you choose to use a plastic tub, lining it with a plastic bag will prevent any absorption of flavors from previous pickling batches. (plus give you extra protection against insects getting in.)
Other Ume Delights: Umeshu, Syrup & Jam
Even after making several batches of umeboshi, I still had plenty of fruit left over. Rather than let any go to waste, I turned the remaining harvest into umeshu, syrup, and jam.

Umeshu (Plum Liqueur)
Umeshu, often called “plum wine,” is a sweet and tangy liqueur made by steeping green ume fruits in rock sugar and a neutral distilled spirit. It’s a popular, refreshing drink, especially in summer.
Since we still had a good stock of umeshu from two years ago, I decided to change things up this time by experimenting with a plum variety called Sumomo. It tastes a bit… medicinal to be honest. Plain ume works better for this.
Ume Syrup
Ume syrup, a non-alcoholic, sweet, and tart syrup, is made by macerating ume with rock sugar. Diluted with sparkling water, it’s the perfect thirst-quencher when Japan’s summer heat really kicks in.
Ume Jam (Using Broken Ume)
For all the leftover ume with broken skins, it was a “waste not, want not” scenario with ume jam. This batch required a generous amount of sugar to keep it from being face-puckeringly sour.
If you’re curious to see all these processes in action, from the ume harvest to the final taste test, be sure to watch the full video.
What do you think of my process? How did your own umeboshi attempts and experiments work out for you? Let me know in the comments!
FAQ about Umeboshi
Despite being commonly called “Japanese plums,” ume are actually closer to apricots than the sweet plums many people are familiar with. They’re much more acidic and are rarely eaten fresh, which is why they’re typically used for umeboshi, umeshu, and syrup.
Properly salted umeboshi can last for years when stored in a clean, airtight container in a cool location. In fact, many people believe the flavour improves with age. Once opened, keeping them refrigerated can help maintain quality.
No. Sun-drying (土用干し, doyoboshi) is traditional, but some people enjoy umeboshi straight from the brine. Drying changes both the texture and flavour, producing a richer, less sharp result.
Yes. While traditional ume produce the classic flavor, I’ve successfully made umeboshi with apricots, black plums, and even sumomo. The results are different, but experimenting with other fruits can be a fun alternative if ume are difficult to find.
Yes. Umeboshi made without shiso are often called shiroboshi (白干し). Without the shiso leaves, the plums retain their natural pale colour and allow the pure flavour of the ume to shine through. Shiso adds the traditional red colour and shiso flavour, but it isn’t required for successful pickling.
Yes, you can. The key is to thoroughly clean whatever you use to prevent mold. For example, if you use clean rocks, make sure you boil them first to kill any bacteria.
Nope, not necessarily! As long as you’re diligent about cleaning the plums and checking them regularly, you don’t need a pickling bag.
However, if you want an extra layer of protection from air and bugs, they’re a great option.
You can, but lower-salt umeboshi are generally more prone to spoilage and mold. Traditional recipes often use 18–20% salt by weight because it acts as a preservative. If using less salt, you’ll need to be extra careful about sanitation and storage.