It’s the hush of a rural train pulling in with no announcement. A vending machine glowing on an empty road. A local grandmother greets you like she’s known you forever. This is the side of Japan I fell in love with — the countryside, or inaka — and the one I think every traveler should experience at least once.
While Japan is known for its ease of travel, there are some things to prepare for if you extend your visit beyond established big-city destinations like Tokyo or Osaka. In this guide, I’d like to share some essential tips I’ve learned while exploring rural Japan. From how to get around and ordering in a small-town diner, to what the internet situation is like, these tips will help you plan a countryside trip to Japan of your dreams.
Not sure how far off the beaten path you actually want to go? Start with my Choose Your Inaka Level guide to figure out whether you’re better suited to an easy countryside day trip—or ready for full-on deep inaka journey.
- Rural Japan Travel Checklist
- How Do I Get Around Rural Japan?
- What is the Internet Like in Rural Japan?
- Where to Stay in Rural Japan?
- What Are Some Budget-friendly Things to Do?
- Where Do I Find Food in Rural Japan?
- What Are Some Essentials to Pack?
- What Is It Like for Foreigners Traveling in Rural Japan?
- Choose Your Inaka Level
- Conclusion
Rural Japan Travel Checklist
Countryside Japan is magical — but it’s not always convenient. Planning a bit ahead can turn your trip from stressful to unforgettable.
Make Sure To:
Common Mistakes to Make:
How Do I Get Around Rural Japan?
While some easily accessible towns can be reached entirely by public transit, some remote areas might need a rental car. Here are things to keep in mind for each:
Trains
Local countryside trains aren’t just transportation… they’re part of the experience.
While the Shinkansen (express bullets) will get you from point A to point B in record time, the small countryside trains will let you explore much more leisurely. I personally love rural trains because they give you time to enjoy the scenery, it’s less stressful than driving, and it can inject some train-hopping spontaneity into your trip.
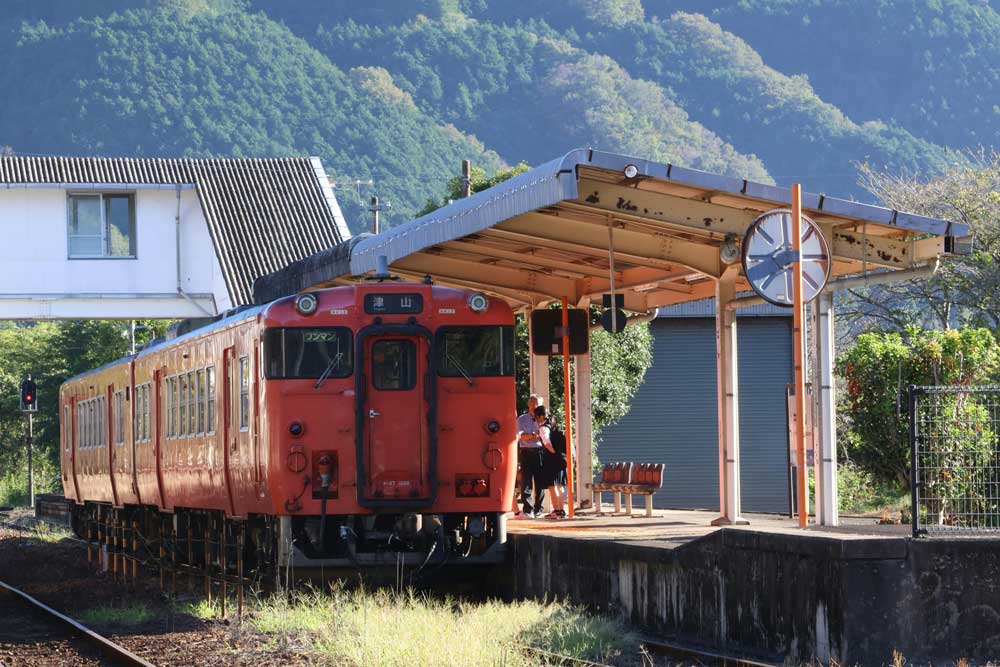
Private railway lines often require additional fees to ride certain local trains. Many accept prepaid train passes like Pasmo; however, some older lines (and much of Shikoku island) have been slow to adopt these methods of payment and only accept cash. Be sure to have a coin purse on hand for these transactions.
Train Traveler Tips
✅ Do:
- Check closing times for local trains; some can close early, leaving you stranded.
- Take a photo of the station + timetable
- Carry coins/small bills
🚫 Don’t:
- Assume trains run frequently
- Assume station staff will always be present
- Assume IC cards work everywhere
JR vs. Private Railways
Japan’s rail network is split between:
- JR (Japan Rail) → largest network (especially between big regions)
- Private Railways → local/regional lines (common in countryside areas)
Japan Railways (JR) operates the largest railway network in Japan, covering about 70% of the country, while the rest is served by private railways. If you are traveling between larger centers, you are likely to board one of these tiny, occasionally unmanned stations to reach your rural destinations.
Rail Passes: What Makes Sense Now
While the 2023 price increase on the once-affordable JR Rail Pass has made it less appealing for travelers, many regional passes can still be a fantastic value if you’re exploring one area.
Some regional passes (including JR and non-JR passes) include:
- ALL SHIKOKU Rail Pass
- Hokkaido Rail Pass
- JR East-South Hokkaido Rail Pass
- JR KYUSHU RAIL PASS
- JR EAST Tohoku Area Pass
- JR EAST Nagano, Niigata Area Pass
- JR West All Area Pass
- JR WEST Kansai Area Pass
- Hokuriku Arch Pass
- JR TOKYO Wide Pass
Rental Car
If you want the freedom to explore rural Japan (and not be beholden to public transit), renting a car is hands-down the best option.
Some countryside destinations can be reached by train or bus… but the deep inaka often has limited schedules, early final trains, and long gaps between services. With a car, you get something rural Japan does really well: freedom.
To drive in Japan, you’ll need an International Driving Permit (IDP) — and it must be obtained before you leave your home country.
How to book your rental car ahead?
It’s tempting to sort it out at the rental company, but I strongly recommend booking ahead. It:
- locks in your vehicle (especially important in rural areas)
- saves time and stress on arrival
- ensures your rental agreement is clear and available in English
Some English-friendly rental companies include:
- Toyota Rent a Car
- Nippon Rent-a-car
- Budget Car Rental
Most major rental companies have locations near airports and train stations, which makes pickup easy.
What Are Some Essential Driving Tips in Japan?
Driving in Japan is generally safe and calm — but a few details can trip people up if they’re used to North American roads:
- Turning & Advance Signals: Japan drives on the left, so everything feels reversed at first. If you’re in a right-turn lane at a red light (equivalent of a left turn in North America), you must wait until your traffic light turns green. Also, in Japan → advanced turn arrows often appear after the red light, not before the main green.
- Railroad Crossings = Full Stop. Railroad crossings act as stop signs. Come to a complete stop before crossing (locals take this seriously).
A simple positioning trick: To stay properly centered on the “right” side of the road, I remind myself of what an old Canadian trucker once told us: The driver’s side should always be closest to the center line. It sounds simple, but it helps a lot during your first hour on unfamiliar roads.
Is Electronic Toll Collection (ETC) Worth It?
Japan’s ETC (Electronic Toll Collection) system is a convenient way to pay tolls on expressways and makes highway driving much faster and smoother. If you have an ETC card, you can pass through toll gates without stopping to pay cash—avoiding lines and delays, especially at busy interchanges.
Most rental cars already have an ETC reader installed, and many rental companies will rent you an ETC card as well.
That said, using toll highways isn’t always necessary—especially if you’re traveling slowly, exploring rural areas, or trying to keep costs down.
There are plenty of times Jesse and I choose back roads instead. They often save money and only add a few extra minutes, while offering far more scenic drives through villages, farmland, and mountains. But when toll roads save us hours rather than minutes, we happily opt for the ETC and consider it time well spent.
How to Use the Tollbooths & ETC lanes
Generally, the expressways have two types of lanes:
- ETC-specific lanes (Purple toll gates for cars with an ETC card)
- General lanes (Green toll gates with cash/manual payment)
Important note: Some highway entry/exit points are marked “ETC Only” and will not accept cash payments — you can’t use these routes unless you have an ETC card.
✅ So, take ETC highways if…
- You want the most direct route between towns/cities (less navigation stress)
- You’re trying to save time and reach your destination faster
- You’re doing a long driving day (highways can seriously reduce fatigue)
- You’re traveling during bad weather (better to be on a highway than on some narrow mountain road)
🚫 Skip ETC highways if…
- You prefer backroads and scenic stops
- You’re on a flexible schedule and don’t mind taking your time
- You’re budget-conscious and want to avoid toll fees
What is the Internet Like in Rural Japan?
The thing about internet signals in Japan is that you can find it almost everywhere—cities, convenience stores, cafés, and even many rural towns have solid coverage. But once you head into the mountains, all bets are off.
If you’re trying to decide between an eSIM and pocket Wi-Fi specifically for countryside travel, I’ve written a full breakdown here: eSIM vs Pocket Wi-Fi for Rural Japan (Which Actually Works?)
No matter what you’re using—eSIM, pocket Wi-Fi, or local SIM—Japan’s narrow valleys and dense mountain ranges can block signals completely.
If you set your route while you do have a signal, most map apps will continue guiding you, even through low-signal areas. But if you reset the app or try to reload directions while you’re in a dead zone (for example, between valleys), you may not be able to get your route back at all.
(I’ve lost count of how many times I’ve been driving through the mountains, watching my GPS spin endlessly, resetting my phone… only to realize I had absolutely no connection. At that point, you just keep driving and hope there’s a break in the mountains where your map app finally loads again.)
One suggestion is to take a screenshot of your map route before you start driving. If you lose GPS completely, at least you’ll have a visual reference—and something you can show a wandering local if you need help.
Free Wi-Fi (Hotels, Ryokan)
While on the topic, most business hotels and traditional ryokan offer free Wi-Fi—except for very remote accommodations that proudly advertise being “disconnected from the internet” (cough looking at you, Lamp no Yado Aoni Onsen cough).
However, public and hotel Wi-Fi isn’t especially secure. If you plan to use it regularly, I’d recommend using a VPN to encrypt your connection, or at least choose an eSIM that includes built-in security and encryption.
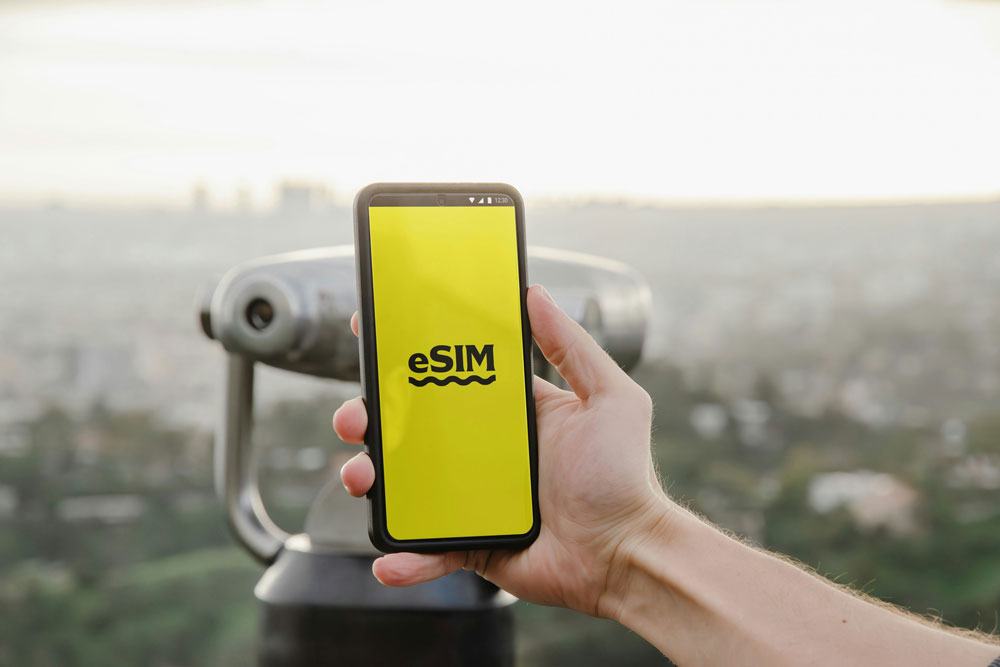
eSIM vs. Pocket Wi-Fi
One of the easiest ways to get internet in Japan while traveling is to use an eSIM or pocket Wi-Fi. Both are reliable, widely used, and far more convenient than relying on public Wi-Fi, and they help you avoid exorbitant roaming charges from your home provider. However, they suit different travel styles.
An eSIM is a digital SIM card built directly into your phone. There’s no physical card to swap out. Instead, you install it through an app or QR code, and once you arrive in Japan, you simply switch your phone over to the eSIM plan to connect to local Japanese networks. (Remember the physical cards you had to insert into your phone? That is an experience I am not going to have to repeat again.)
Many eSIM providers offer apps that let you monitor usage, add data instantly, or extend your plan if you’re running low. Because the SIM profile is installed directly on your phone, you can control everything from switching networks to disabling roaming through your device settings. It’s a very “set it and forget it” option once installed.
A pocket Wi-Fi, on the other hand, is a small portable router you carry with you. It creates a personal Wi-Fi network that multiple devices can connect to at once. It’s usually more expensive than an eSIM, but it comes with higher data limits and greater flexibility if you’re traveling with others, doing heavy uploads, or using a laptop.
When an eSIM Makes the Most Sense
If you’re traveling solo, don’t plan to use much data, or want cheaper data options, eSIMs are usually the best choice. Most eSIM providers let you manage everything directly through their app, including instant top-ups, so no stores, no SIM swaps needed.
It’s especially convenient if your itinerary changes mid-trip or you decide to head somewhere more rural than planned.
📵 That said, eSIMs do have one important limitation: your phone must be unlocked. If your phone is still locked to your home carrier (often the case if it’s under contract), an eSIM won’t work. This is something worth checking before you leave home.
When a Pocket Wi-Fi Makes More Sense
If you’re the kind of traveler who works on vacation, runs a blog, uploads videos, or just wants dependable data for photos and backups, a pocket Wi-Fi is often the better choice.
It’s usually more expensive than an eSIM, but it typically offers much larger data allowances and can be shared between multiple devices. That makes it ideal for laptop use, heavy uploads, or traveling as a pair or group. It’s also an option if your phone is carrier-locked and you can’t use an eSIM.
One thing to note: most pocket Wi-Fi devices don’t include encryption by default, so if privacy matters to you, pairing it with a VPN is a good idea.
I’ve rented pocket Wi-Fi even while living in Japan—especially for trips where I need my laptop, access to work emails, or the ability to upload a last-minute YouTube video.
I’ve personally used Sakura Mobile and Japan Wireless, and both offer very similar service. Sakura Mobile tends to be slightly better for longer stays due to its long-term plans, while pricing between the two fluctuates. At the time of writing, Sakura Mobile had a small edge, but this can change, and it’s worth checking your dates.
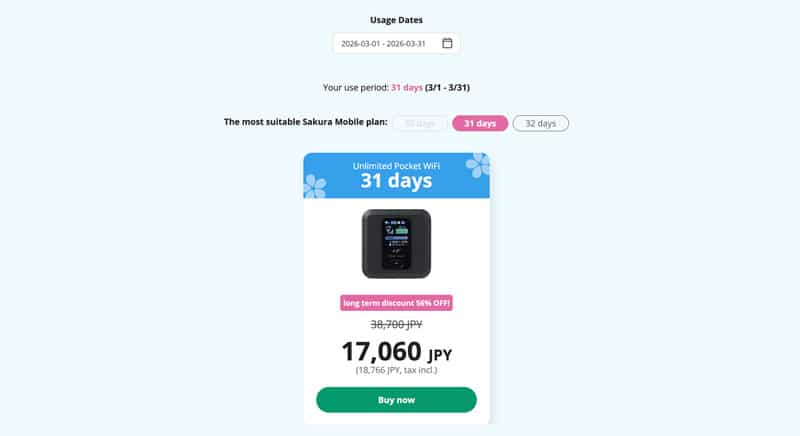
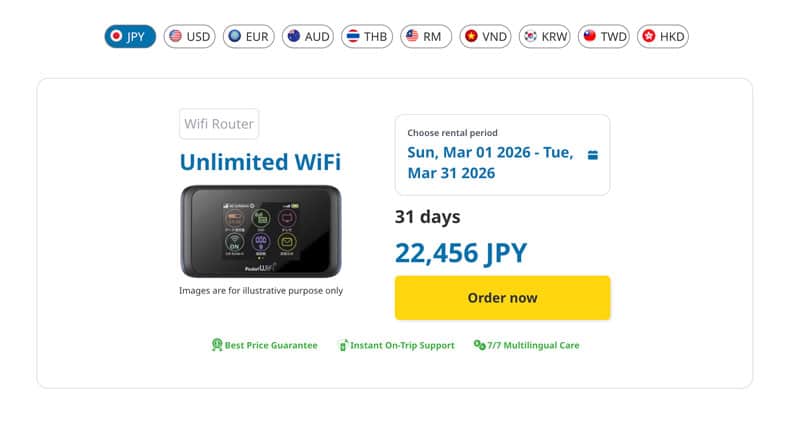
In my experience, both are excellent. They deliver directly to your door, include unlimited data, a power bank, and a prepaid return envelope—when you’re done, you simply drop it in a mailbox and move on.
Most recently, I used Japan Wireless on a trip to Naoshima. When I realized I needed to extend my rental by a couple of days, I emailed customer service, who replied the same day, extended the plan, and charged my card—no hassle, no back-and-forth. That kind of friction-free support makes a big difference when you’re already on the move.
So Your Options for Connectivity Are…
📱 Best for solo travelers (eSIM)
If you’re traveling solo or looking for flexibility and affordability, an eSIM is usually the easiest option. I use Saily eSIM—it’s been simple, reliable, and easy to top up directly from the app. You can get 10% off your first order with code MAIGOMIKA10.
📡 Better for groups or heavy-data users (Pocket WiFi)
If you’re traveling with multiple people/devices, a pocket WiFi can be a better choice. I’ve used both Sakura Mobile (more flexible plans, especially for longer stays) and Japan Wireless (known for strong coverage and heavy data usage), and both have been solid options in my experience.
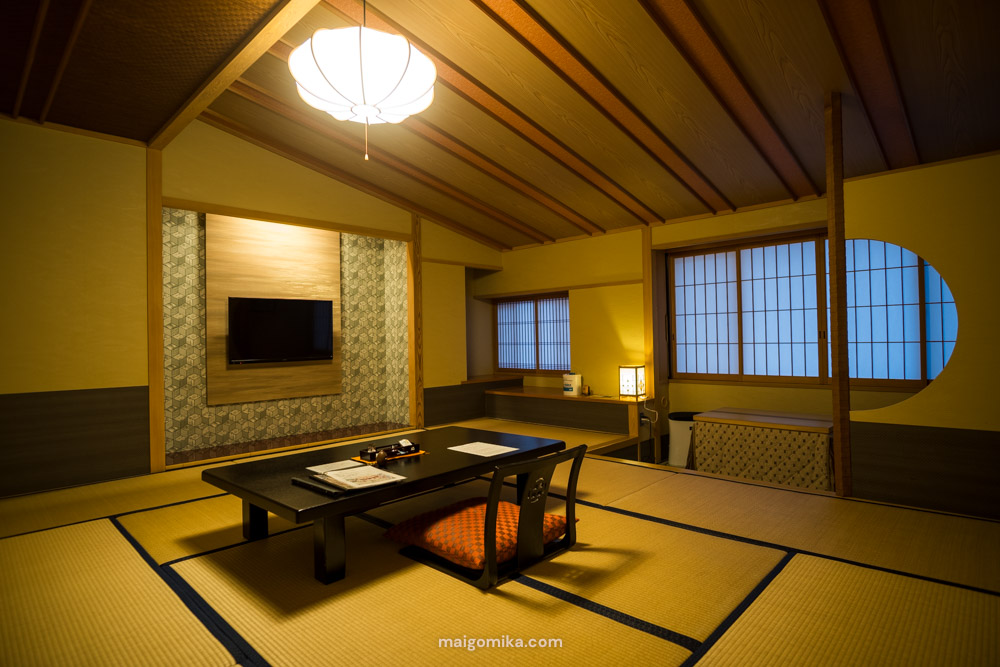
Where to Stay in Rural Japan?
Japan has no shortage of places to stay—but once you head into rural Japan, a little pre-planning goes a long way.
Accommodation options thin out quickly outside cities, and many traditional stays don’t have English websites or the capacity to accept last-minute walk-ins. Unlike business hotels, which usually have more rooms and more flexible availability, traditional inns tend to fill up in advance and rarely accept guests off the street.
Another thing to keep in mind: many countryside accommodations are family-run and operate on a set rhythm. Meals are often included in the stay, so advance reservations are essential. English support can also be limited (not a bad thing at all because it’s part of the experience!), but it does mean arriving unannounced isn’t always welcomed.
Payment is another area where expectations might need adjusting. While credit cards are becoming common, more off-the-beaten-path places may still be cash-only—so don’t rely on cards alone. Always carry some cash when traveling rurally.
Types of Accommodations You’ll Find
The Japanese countryside isn’t short on places to stay—each one tends to be an experience in itself. These are my favorite options:
- Ryokan: Traditional inns with tatami rooms, futons, onsen baths, and beautifully prepared multi-course kaiseki meals
- Minshuku: Simple, family-run lodgings that feel homey and personal
- Guesthouses: Budget-friendly, social, and often community-focused
- Business Hotels: Practical, affordable, and the easiest option for last-minute stays
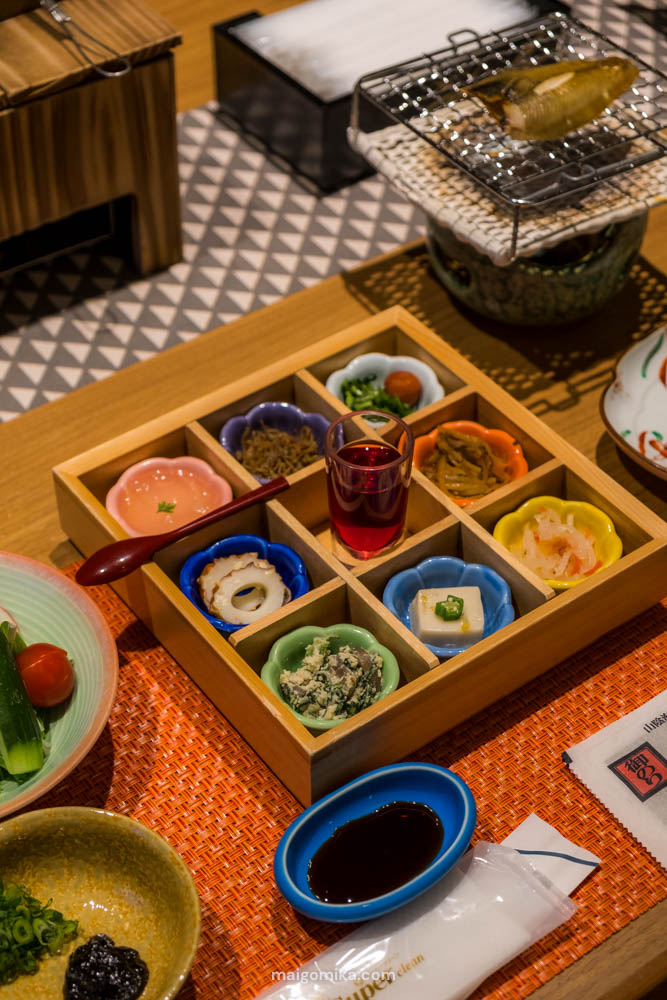
My #1 countryside lodging tip: book meals included
This will save you. Truly.
Japan doesn’t have a strong breakfast-out culture, and in rural towns, restaurants may be limited—or close early. Having meals included means:
- You’re guaranteed food after a long travel day
- The meals are usually high-quality and deeply local
- You don’t have to stress about what’s open (or not)
✅ If available: book dinner and/or breakfast.
My Booking Platform Trick (Agoda vs Booking.com)
I still use both, but when booking accommodation in Japan, I’ve started prioritizing Agoda.
Agoda is more widely used across Asia—especially in Japan—so it often has a broader inventory of business hotels, ryokan, and regional stays that don’t always appear on other platforms.
That being said, both platforms have great apps, with some key differences:
Booking.com (Best for flexibility)
- Often includes free or flexible cancellation
- Very user-friendly app
Agoda (Best for good rates in Japan)
- Stronger inventory in Japan/Asia
- Business hotels + ryokan listings are often bigger
- Price competitive
What Are Some Budget-friendly Things to Do?
The countryside is built for slow adventure. And the best part? Much of it is free.
Biking, walking, and hiking are some of the most rewarding and budget-friendly ways to explore.
Hiking
Japan is over 70% mountainous, meaning well-maintained hiking trails (tozan-dō) are everywhere. Look for local hiking trails, temple mountain routes, or prefectural parks.

Unlike national parks in some countries, entry is typically free. The only cost will be transportation to the trailhead.
Add these hiking spots to your itinerary:
- Mt. Ishizuchi (Ehime)
- Mt. Aso (Kumamoto)
- Mt. Hiko (Fukuoka)
- Yufugake (Oita)
Cycling
A popular and cheap way to cover ground. In addition to iconic routes like the Shimanami Kaidō, nearly any coastal or rural river road offers fantastic scenery.
The first time I stumbled across a bike rental at one of the many tiny countryside tourism centers, I saw it as just a way to pass an afternoon. What I actually discovered was one of my most favourite ways to explore the countryside.
You get off the main road, leave the guidebook behind, and suddenly you’re cruising through areas that feel residential.
I’ve gotten intentionally lost countless times, and because of it, I’ve found some of the most stunning scenery, stumbled onto hidden cafes I would never have found otherwise, and gotten a peek at some stunning Japanese homes and neighbourhoods. It’s like the best kind of people-watching.
I’m also a huge advocate for e-bikes (electric-assist bikes), as they are great for cruising without exhausting yourself on Japan’s occasional hills. You get more distance with less exhaustion and much easier with hills.
✅ My Tip: Check tourism offices (観光案内所 / kankō annai-jo) for bike rentals
Add these biking regions to your itinerary:
- Shimanto City, Kochi Prefecture
- Shimanami Kaido, Ehime Prefecture
- Kamijima Islands, Ehime Prefecture
Incorporate Train-Hopping into Your Trip
Hop off randomly. Wander and explore. The idea here is to stick to unscheduled travel, and jumping onto one of Japan’s local trains without a destination adds so much happy unpredictability to any trip.
When I am about to start one of these adventures, I check Google Maps to find a train stop with a local tourism office (for bike rentals), or just hop on a train, choose a stop that looks interesting, hop off, and start wandering. There’s absolutely no guarantee of what you’ll find, and honestly, that’s the beauty of it.
(And if you’re unsure which connectivity option to bring, read my comparison of eSIM vs Pocket Wi-Fi for Rural Japan.)
You have no highly focused itinerary or guidebook to follow, just the wind in your hair and whatever catches your eye to lead the way.
Some Off-grid train wandering rules
Because you’re embracing unpredictability, you need a few practical precautions:
- Pack Snacks: I recommend packing or stocking up on convenience-store snacks beforehand. The unpredictability means you might end up in an area without any restaurants or shops nearby.
- Photograph the Train Schedule: Make sure to check the train schedule (and snap a photo of it!) as soon as you arrive. Some local stations, especially in rural areas, can close early, or trains might run only once every hour or two.
- Stay Connected: Have an eSim or pocket wifi with you so you can plan your return home when you’re done with your impromptu trip.

Japanese Natural Hot Springs (Onsen)
Sitting in an onsen hot spring has become one of those quintessential, lasting memories during my time in Japan. I still vividly remember my first tentative bathing experience at a Tokyo onsen, until a curious and friendly local grandmother started chatting with me.
Suddenly, I understood the profound power of the hot spring. It’s amazing how open and human people are when you’re all naked and equally vulnerable!
Since that day, I’ve become a die-hard fan of the activity.
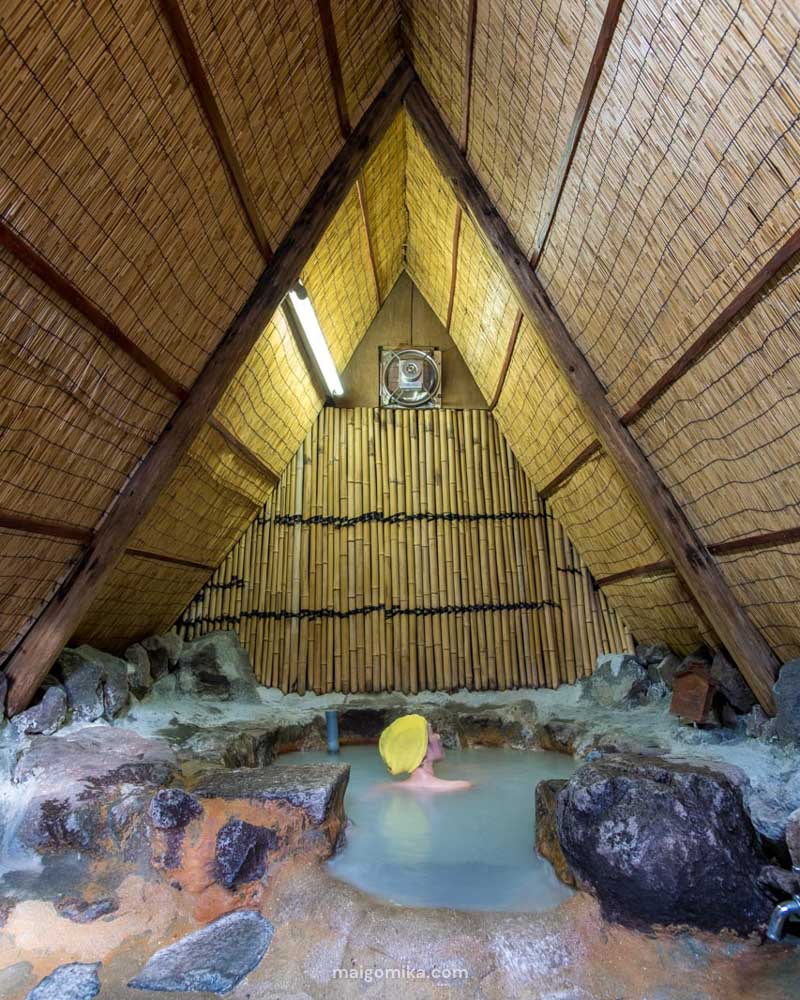
Onsen options
While luxury ryokan onsen can be expensive, keep an eye out for three budget alternatives:
- Day-Use Onsen Higaeri onsen: ¥500–¥1,500. Many facilities, even higher-end ones, offer an entrance for a simple bath without a stay.
- Local Public Baths Sentō: Not natural hot springs, though the experience can be equally nice, and cost only a few hundred yen for a clean, simple, traditional bath experience.
- Foot Baths Ashiyu: These are often completely free and can be found in the center of hot spring towns, offering a quick, relaxing break.
🫣 A Note on Tattoos and Privacy
- Some onsen prohibit entry to guests with tattoos, due to associations with organized crime. In these cases, check whether they offer a private bath option called a kazoku-buro.
- A family-style bath (kazoku-buro) is a private bath. They generally have a slightly higher entry fee, but allow couples, groups, and families to bathe together in a secluded setting.
Add these onsen spots to your itinerary:
- Beppu, Taketa, Yufuin, Oita Prefecture
- Kinosaki Onsen, Hyogo Prefecture
- Kurokawa Onsen, Kumamoto Prefecture
Shrines and Temples
The vast majority of Shinto Shrines (jinja) and Buddhist Temples (o-tera) are free to enter and wander, offering profound cultural insights and beautiful architecture at no cost. Only the entrance to specific inner buildings, museums, or gardens usually requires a small fee.
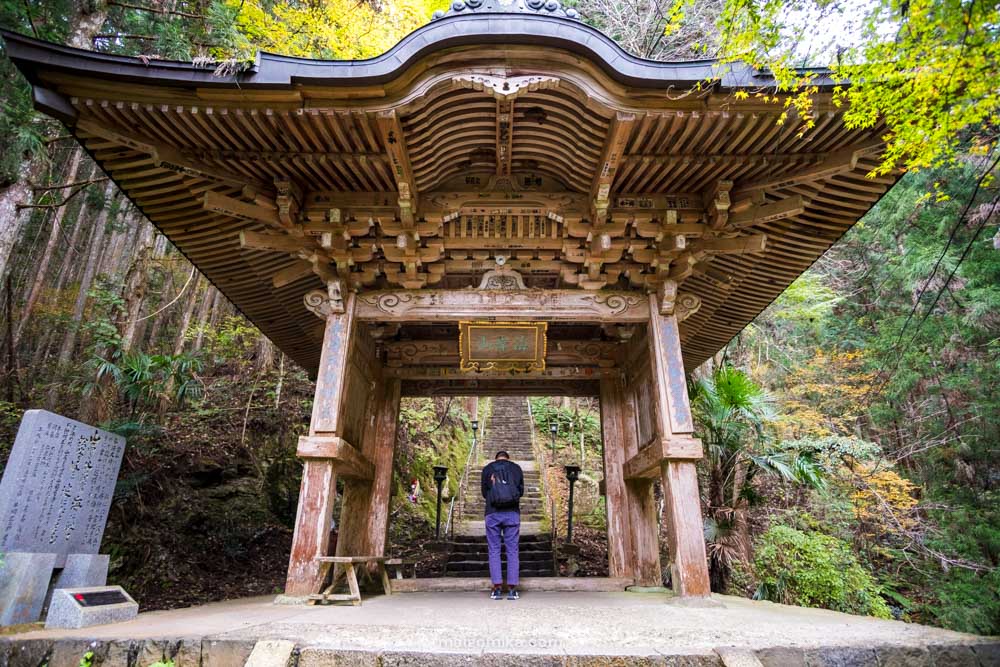
Add these shrine and temple destinations to your itinerary:
- Usa Jingu, Kunisaki Peninsula, Oita Prefecture
- Shikoku 88 Pilgrimage temples
Where Do I Find Food in Rural Japan?
Japan’s reputation for incredible food and service is well-deserved for a reason, and that doesn’t change when you head into rural Japan. However, your options become fewer, more local, and less translated. English support is limited, and in very rural areas, restaurants don’t always operate according to their listed hours on Google Maps (or any schedule at all).
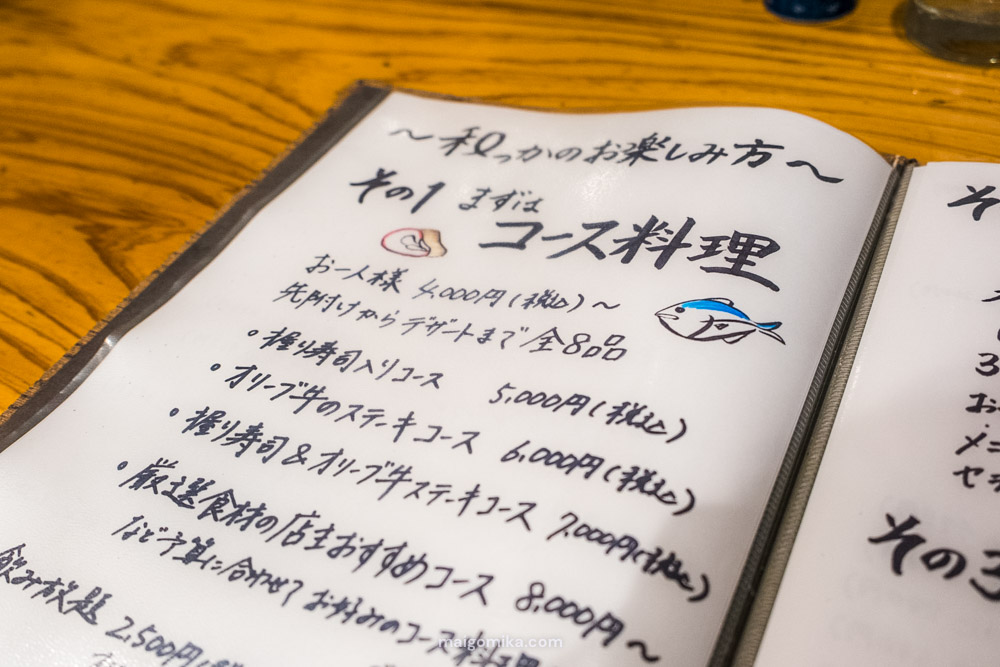
That said, exploring rural food culture is one of the most rewarding parts of traveling in Japan—especially if you’re an adventurous eater. Some of my most memorable meals have been in tiny izakayas with handwritten menus that translation apps won’t even attempt to translate. I’ve pointed at random items, ordered blindly, and hoped for the best. But those meals also often come with conversation, with locals asking where you’re from, recommending their favorite dishes, and even checking in to see if you’re enjoying yourself.
A Note on Dietary Restrictions: Many rural eateries aren’t equipped to handle substitutions or complex requests (especially vegetarian or vegan), and staff may not be familiar with certain dietary terms. Research in advance and bring printed cards in Japanese that clearly and politely explain your needs.
Whenever you aren’t eating in your ryokan or minshuku, it will be your job to be proactive about food. Here are some options to keep you fed while you explore.
Local Restaurants
Exploring the regional specialties is a highlight of any countryside trip, though it can require a bit of planning and patience.
Reservations are often handled by phone, and menus may be entirely handwritten in Japanese. To avoid being turned away, I always aim to arrive right when a restaurant opens—usually between 5:00 PM and 6:00 PM for dinner.
When entering, I hold up my fingers to show how many people are in my party. If the menu is hard to decipher, this phrase goes a long way: Osusume wa nan desu ka? “What do you recommend?”
Essential Japanese Phrases for Restaurants
Using Sumimasen to call your server and Itadakimasu and Gochisousama deshita at the beginning and end of your meal are the most important phrases for showing proper dining etiquette in Japan. Here are a few more to practice:
| Phrase | Pronunciation | Meaning | Context/Notes |
| Konnichiwa | Konn-ee-chee-wah | Hello | Use when entering the restaurant. |
| Arigatou gozaimasu | Ah-ree-gah-toh go-zah-ee-mas | Thank you (polite) | Use when being served or leaving. |
| Osusume wa nan desu ka? | Oh-soo-soo-meh wah nahn dess kah? | What do you recommend? | Great for ordering! |
| O-hiya | Oh-hee-yah | Cold water (please) | Polite, quick way to ask for a refill. |
| O-kaikei kudasai | Oh-kah-ee-kay koo-dah-sah-ee | The bill, please | Use when ready to pay. |
| Kore o kudasai | Kor-eh oh koo-dah-sah-ee | This one, please. | Use while pointing to a menu item or sample on display. |
| Itadakimasu | Ee-tah-dah-kee-mas | I humbly receive/Thank you for the meal. | Essential—say this before you start eating! |
| Gochisousama deshita | Goh-chee-soh-sah-mah desh-ta | Thank you for the feast/meal. | Essential—say this after you finish eating, especially when leaving. |
| Oishii desu | Oy-shee dess | It’s delicious. | A nice way to show appreciation for the food. |
| Sumimasen | Soo-mee-mah-sen | Excuse me / Sorry. | Use to get a server’s attention. Can also mean “sorry” or “thank you.” |
| Onegai shimasu | Oh-neh-gah-ee shee-mas | Please (polite) | You can add this to the end of any request to make it more polite, e.g., “O-hiya, onegai shimasu.” |
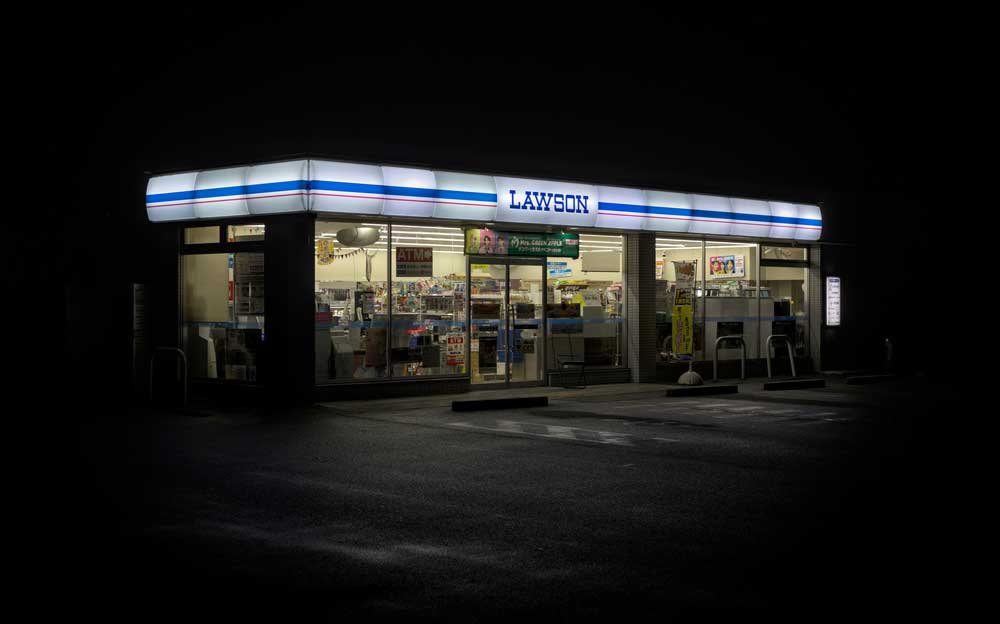
Convenience Stores (Konbini)
“Konbini”, or convenience stores such as 7-Eleven, Lawson, and FamilyMart are lifesavers for travelers. They sell everything from toiletries and socks to ready-made meals—and almost all have ATMs that accept international cards.
That said, konbini are less common in deep inaka. Before heading out for a long drive, hike, or bike ride, I always stock up on onigiri rice balls, sandwiches, snacks, and drinks for easy meals on the go.
Supermarkets
Japanese supermarkets are an underrated food option. They offer high-quality prepared meals—bento, sushi, fried foods—that are perfect for an easy dinner or picnic. Most include chopsticks, napkins, and sauces, making them incredibly convenient.
👛 My Supermarket Discounts Hack
Visit local supermarkets between 5:00 PM and 8:00 PM. This is when prepared foods are often heavily discounted, turning dinner into a budget-friendly win.
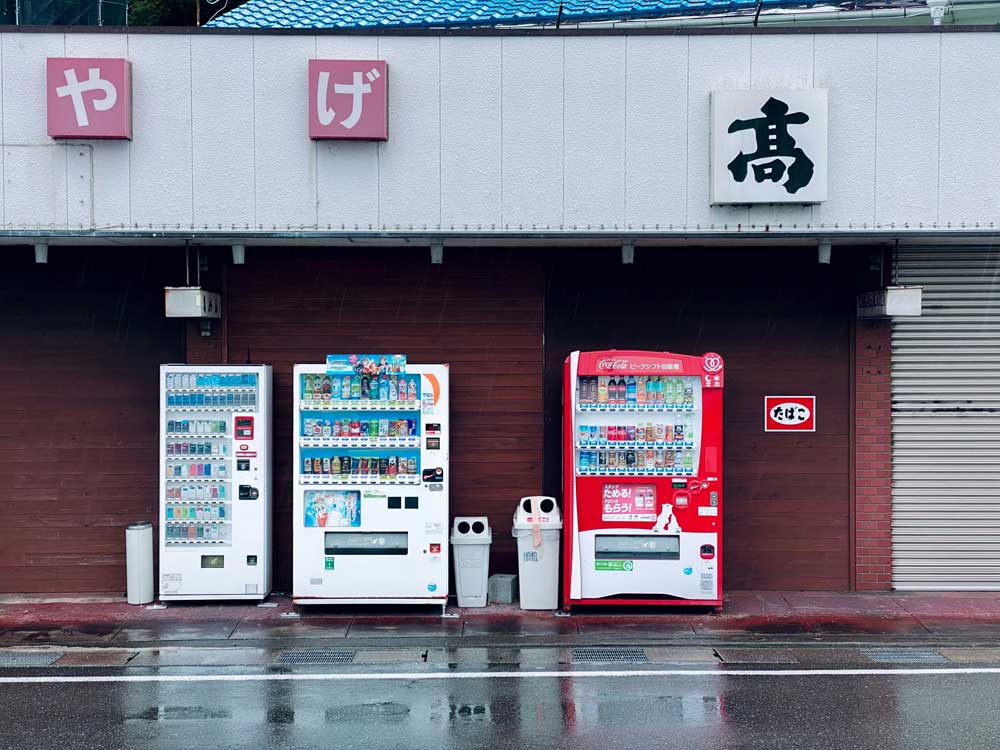
Vending Machines
Vending machines are everywhere in Japan. In some areas, a vending machine might be the only source of food or drink for kilometers.
Most machines cycle their inventory seasonally, dispensing chilled drinks in summer and hot beverages in winter. You can even find “meal-in-a-can” options like hot corn soup or cocoa to keep you going on a cold day.
As a side note, they are also a surprising attraction, especially if you’re traveling with younger people. When my niece and nephews visited as teenagers, they wanted to stop at almost every vending machine we passed—just to see what was inside.
🗑️ Japan Trash Tip: Public trash cans are rare, so carry a foldable grocery bag for wrappers, bottles, and any other litter. I personally love the Shupatto.
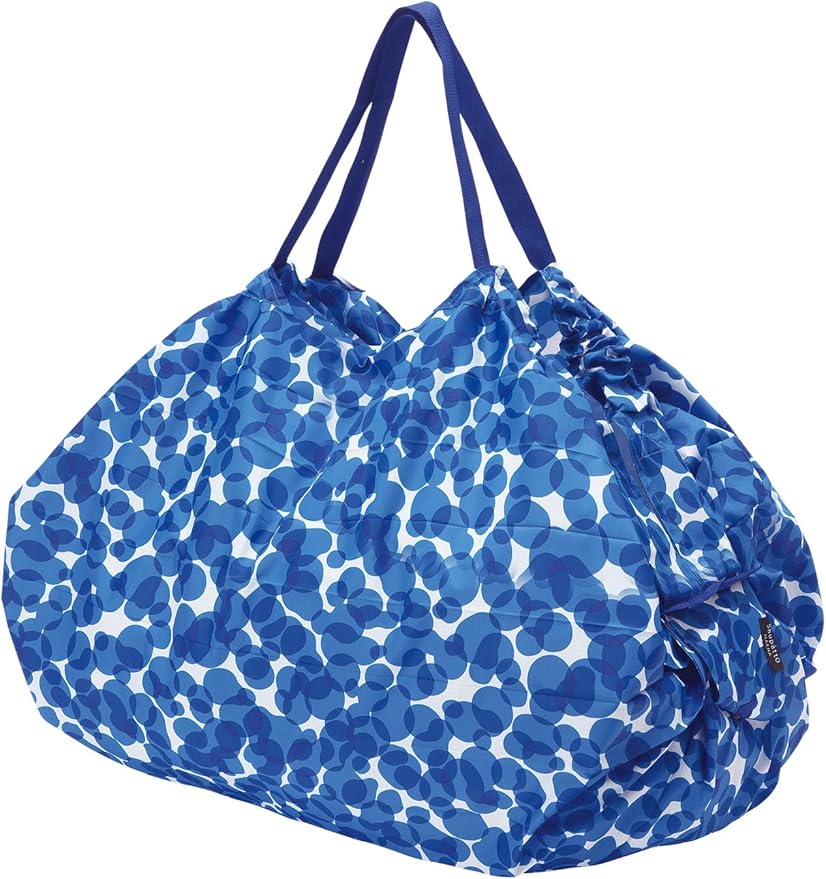
The Shupatto is an onomatopoeia for a fast, brisk action, which describes how it works: grab both ends, pull briskly, and the bag instantly cinches flat.
What Are Some Essentials to Pack?
Cash
Japan is still very much a cash-based society, and that’s doubly true once you leave major cities.
Rural restaurants, family-run inns, local buses, roadside produce stands, temples, and even some accommodations may not accept credit cards, accept cards only intermittently, or politely ask for cash instead. Instead, I recommend:
- Arrive with some cash already in your wallet, especially if you’re heading straight to the countryside.
- Check your bank’s ATM withdrawal fees before you travel.
- In Japan, most foreign cards work at convenience store ATMs (7-Eleven, Lawson, FamilyMart). These usually charge a high, flat transaction fee, so it’s often cheaper to withdraw a larger amount at once rather than make many small withdrawals.
A simpler (and often cheaper) option is an international debit card like a Wise card. You’ll need to order the card in advance and pay a small one-time fee, but once it arrives, you can:
- Load your home currency through the app
- Convert to JPY at better exchange rates when you withdraw yen from konbini ATMs
- Lock your card in case you lose it
After the initial setup, you can avoid the steep foreign transaction and ATM fees that many traditional banks charge, making it especially useful if you’re staying in Japan longer than a short visit.
Easy-to-Launder Layers
Japan’s weather can be unpredictable, so the smartest packing strategy is to bring breathable, quick-dry fabrics (linen, cotton, or technical synthetics work great). Many hotels offer washing machines, but dryers are often weak — or nonexistent. You may end up air-drying clothes overnight, which makes quick-dry materials a lifesaver (and prevents your suitcase from becoming a damp laundry experiment).
The first time Jesse and I visited Japan, we arrived from Vancouver in March wearing black skinny jeans and black tops — only to step into a very cold Tokyo. A few days later, we flew south to Okinawa and felt wildly overdressed in the opposite direction.
Now, I pack loose, easy-to-wash clothing and lots of layers. It lets me bundle up when it’s cold, peel layers off when it’s warm, and adapt easily as both the season and location change.
Slip-on Footwear & Ankle Socks
When choosing shoes for Japan, prioritize comfort and convenience. You’ll likely be walking thousands of steps a day, so bring supportive, easy-to-slip-on footwear — especially since many places in Japan require you to remove your shoes at the entrance.
You’ll often take shoes off at:
- traditional inns (ryokan)
- temples and some shrine buildings
- certain restaurants and cafés
- inside homes (especially in the countryside)
Whenever I travel in summer, I keep a pair of clean ankle socks in my bag. They’re handy for days when I’m wearing sandals but need to cover my feet quickly — since walking barefoot is considered impolite on tatami mats, in shared indoor spaces, restaurants, and temples/shrines.
Emergency Preparation Items
Japan is extremely safe — but it’s also a country where earthquakes, typhoons, and heavy rain are part of life.
The JNTO provides a Japanese-to-English medical information sheet where you can list your:
- medical history
- medication information
- allergies…
which is incredibly helpful if you ever need medical care and are or unwell.
JNTO also has a symptom severity guide that helps you explain how serious something feels — even if your Japanese is limited.
You can also download a disaster alert app, such as Yurekuru Call (iOS /Android), J-ALERT (NHK World) iOS /Android, Safety Tips (iOS /Android), and Japan Travel by NAVITIME (iOS /Android).
Once installed, you can forget about them and enjoy your trip — but if something does happen, you’ll be very glad they’re already on your phone.
What Is It Like for Foreigners Traveling in Rural Japan?
Contrary to popular belief, traveling through rural Japan as a foreigner is often very safe—and more welcoming than people expect.
If you catch a few second glances, it’s usually not hostility. Most international travelers stick to major hubs like Tokyo and Kyoto, so once you head into the real countryside, seeing a foreigner can still be a surprise. Those looks are almost always rooted in curiosity and interest, not judgment.
In many ways, people in rural areas can feel more approachable than in big cities. Locals are often more relaxed, more willing to strike up a conversation, and genuinely curious about where you’re from and why you’ve come so far off the beaten path.
That said, a few cultural cues go a long way.
- Don’t jump lines
- Keep your voice low on trains and buses
- Respect personal space and keep belongings close
- Avoid strong perfumes or overpowering smells
If you really want to go the extra mile, small gifts (omiyage) can be wonderful icebreakers—especially in rural areas where people often hand out vegetables or fruit from their garden.
Catching a few curious stares? Here’s what you do:
👁️ Make eye contact.
😀 Flash a friendly smile.
🙋 Say “Ohayō gozaimasu” in the morning or “Konnichiwa” in the afternoon.
Stares are usually out of curiosity. Doing this instantly shifts the vibe from awkward to friendly (and will almost always earn a bright, cheerful greeting in return).
Choose Your Inaka Level
“Inaka” can mean very different things depending on access, infrastructure, and comfort level. Here are three distinct levels to help you decide what kind of countryside experience is realistic for your trip.
Level 1: Easy Countryside (Perfect for first-timers)
✅ Best for: people who want rural scenery without the stress
- The Vibe: You stay in a major hub (like Kyoto, Kanazawa, or Sendai) but take 1-hour train rides into the mountains or coastal villages.
- Logistics: Entirely doable via public transit. You’ll have English menus and 24-hour convenience stores to return to at night.
Level 2: Rural Base Town (small city hub + nature excursions)
✅ Best for: slow travel + scenic routes
- The Vibe: You stay in a smaller regional town (like Takayama, Tamba Sasayama, and Yufuin). It feels “country,” but there are still cafes, a few taxis, and a walkable downtown.
- Logistics: Take local trains + rent bikes. A car becomes helpful but not essential.
Level 3: Deep Inaka (Remote countryside)
✅Best for: adventurous travelers
- The Vibe: Authentic, quiet, and rugged (Like Bungo Takeda, Kurokawa Onsen, and Umaji Village. You’ll find incredible hidden onsen and local festivals, but very few English signs.
- Logistics: A rental car is mandatory. Trains may run only once an hour (or stop entirely by 8:00 PM), and restaurants often require advance reservations or close early. Expect limited transit, early closing times.
👉 Still not sure how rural is too rural for you? Read Planning a Trip to Rural Japan? First, Choose Your Inaka “Level” That Fits Your Travel Style. I walk you through the three countryside levels, who they’re best suited for, and real place ideas so you can choose the version of inaka that actually fits you.
Conclusion
Venturing into the Japanese countryside is one of the most rewarding travel experiences you can have. With the right transport plan, a local-style stay, and a little preparation for connectivity and food, you’ll unlock a quieter, deeper side of Japan that most tourists never see — the Japan I fell in love with.
Which travel style calls to you most: the freedom of a rental car chasing hidden views, or the relaxed rhythm of hopping off local trains wherever curiosity leads you? Tell me in the comments — I’d love to hear what kind of countryside trip you’re planning.